Quick Links: New/Current Students | Tutorials | Mobile Site Info | General FAQs
Welcome to ctcLink!
This page offers guides and assistance to help you start your RTC journey in ctcLink.
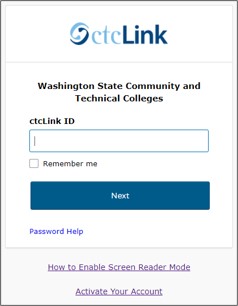
Log into ctcLink
| ctcLink Login |
Activate Your Account
Once you have activated your ctcLink account, you can use a free app on your mobile device or this user-friendly desktop version of the mobile site. You will find directions for student processes in both versions on this page.
| Activate your ctcLink Account |
- If you have already received a ctcLink ID number from another college and activated your account
with them:
- You do not need to activate your account again or receive a new number
- Use your existing number
Step 1: Go to: https://gateway.ctclink.us/
Step 2: Click Activate Your Account at the bottom of the page. When a message pops up, click OK.

Step 3: On the Activate Your Account page, enter:
- First Name
- Last Name
- Date of Birth (MM/DD/YYYY)
- ID Type (enter your ctcLink ID)
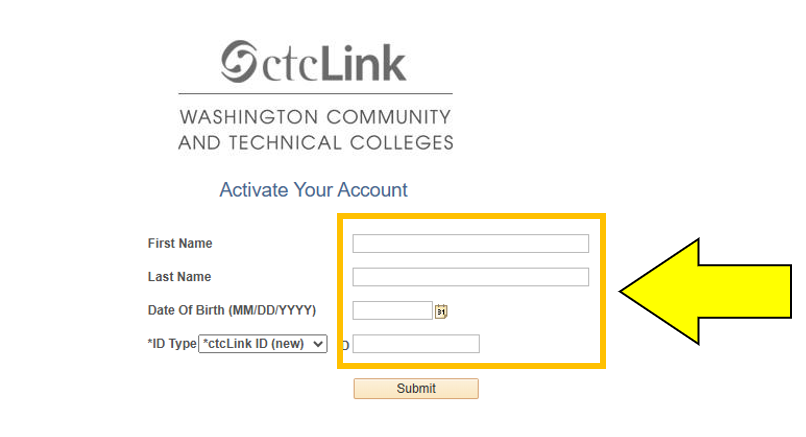
Step 4: Click Submit.
How to Set Your Password
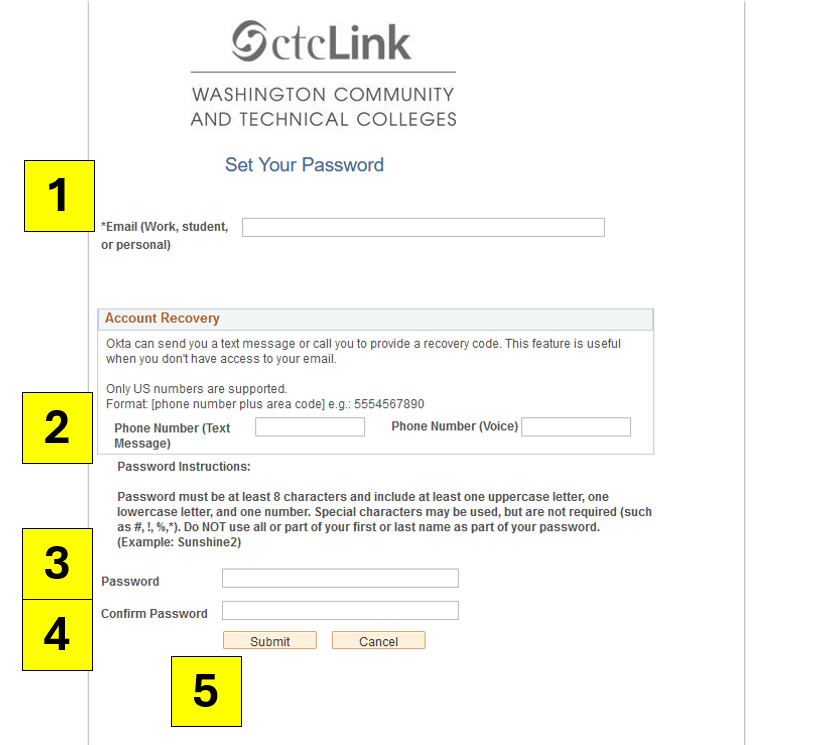
Step 1: Enter your email.
Step 2: In the Account Recovery box, add your phone number: Choose either text message (SMS) or voice call.
Step 3: Create your password.
- At least 8 characters
- Include 1 uppercase, 1 lowercase, and 1 number
- Don’t use your name in your password
Step 4: Type your password again to confirm it.
Step 5: Click Submit.
Step 6: Click the OK button for Account Activation confirmation.
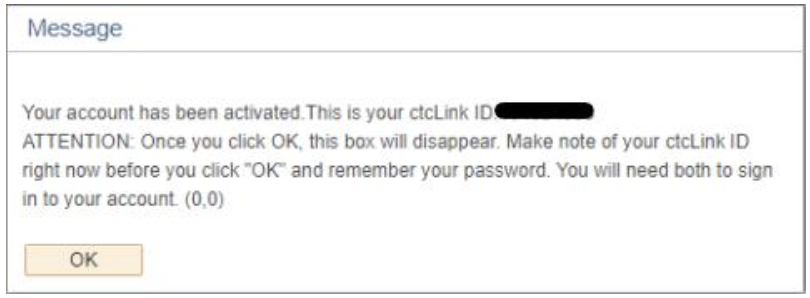
Keep Your Credentials Safe
IMPORTANT: Keep a record of your ctcLink account information on your private smartphone and/or a secured password manager to help you recover your ctcLink login credentials, as needed.
Video: Account Activation
Activation instructions in other languages:
Are you a New Student or a Current Student?
ctcLink Tutorials
For tips on how to use ctcLink, you can take this free and easy course. You will learn to:
- Set up your user preferences and personalize your Student Homepage.
- View the Student Homepage Profile Tile to update Personal Information such as name, email address, phone number, address, emergency contacts, ethnicity information, and privacy restrictions.
- Review the Student Homepage Tasks Tile to view and update holds and to-do list items (service indicators, checklists).
- View and Use Message Center.
- Use the Student Homepage Manage Classes Tile to manage enrollments and class schedule (add, drop, swap, search for classes, browse the course catalog, view my classes, use the shopping cart, enroll by my requirements, manage class planner)
- Review and Understand the Student Homepage Academic Progress Tile to understand academic progress and academic advisement information, apply for graduation and view graduation status.
- Review the Student Homepage Academic Records Tile to view course history, grades and transcripts.
- Use the Student Homepage Financial Aid Tile to access and view financial aid data for a given year, view awards summary and accept or decline financial aid.
- Review the Student Homepage Financial Account Tile to view student financial account and make payments.
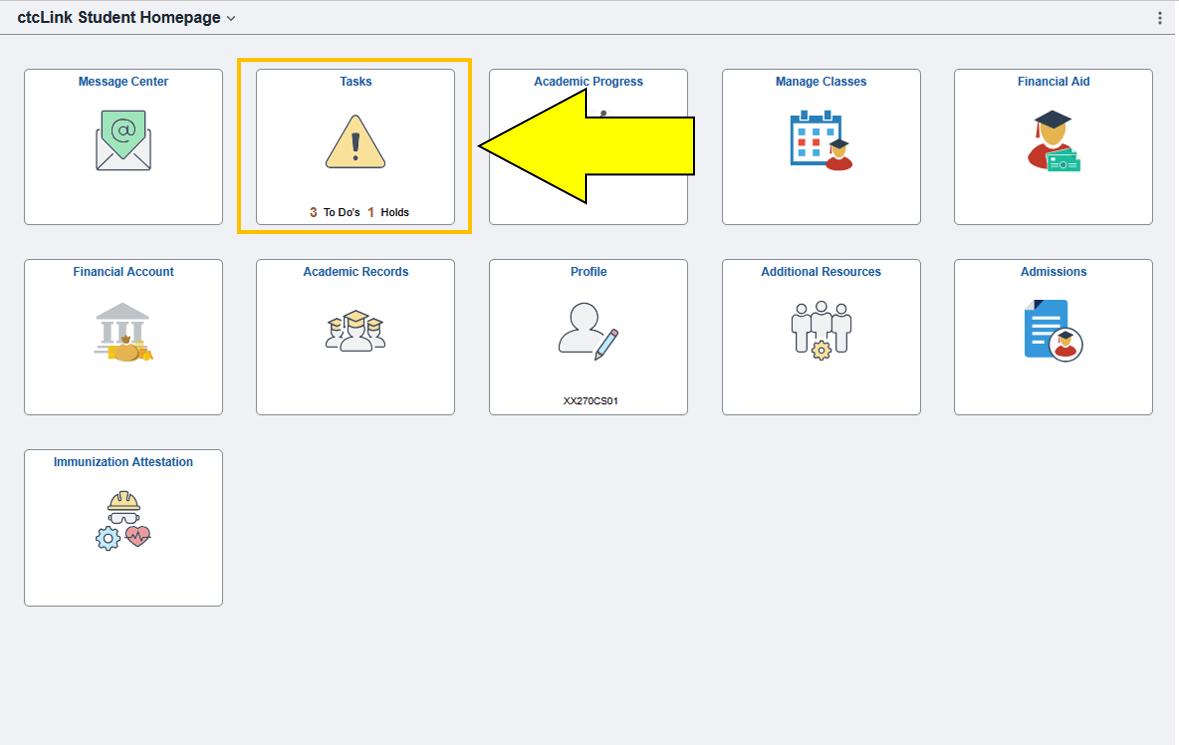
How to Accept SFRA (Full Site)
Step 1: Click on the Tasks (Tile).
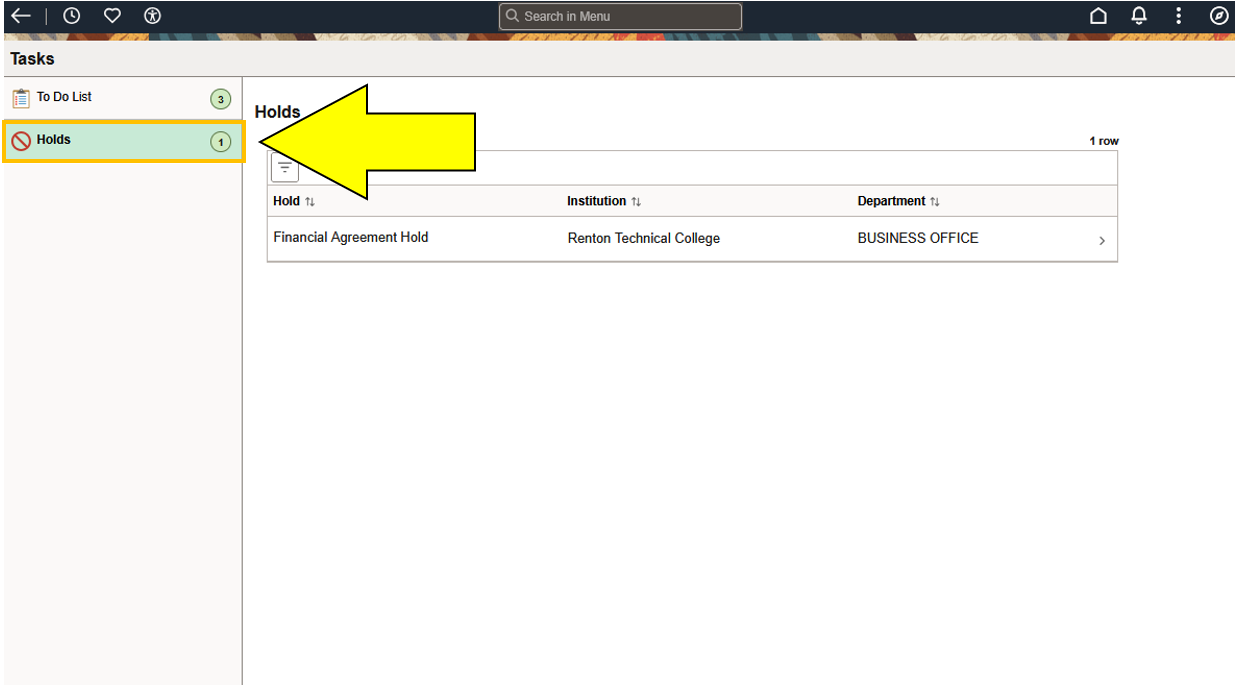
Step 2: Click on Holds.
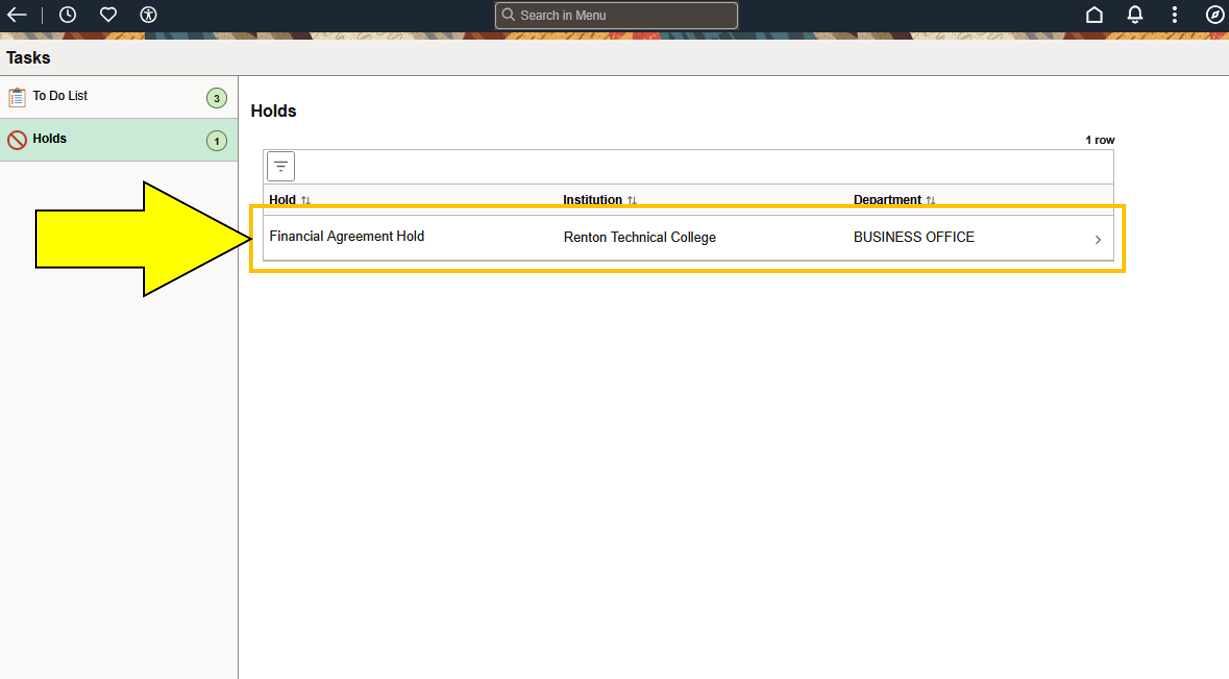
Step 3: Click on Financial Agreement Hold.
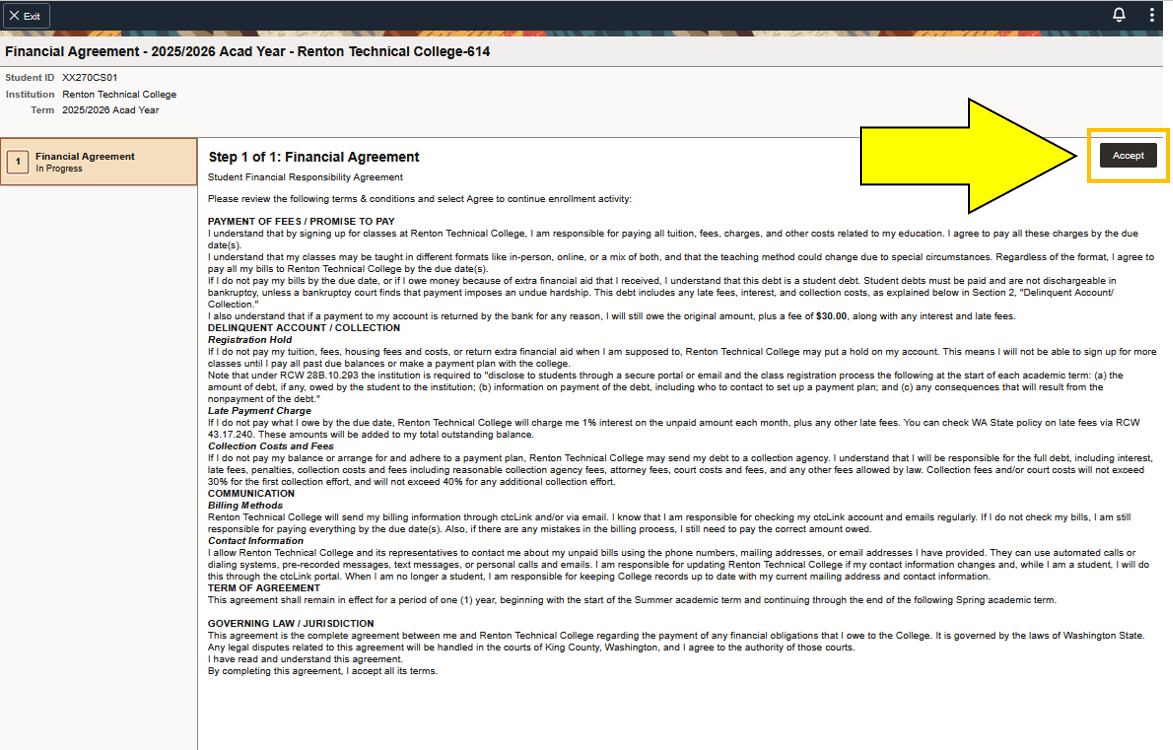
Step 4: Select the Click Here to take me to the Student Financial Responsibility Agreement link.
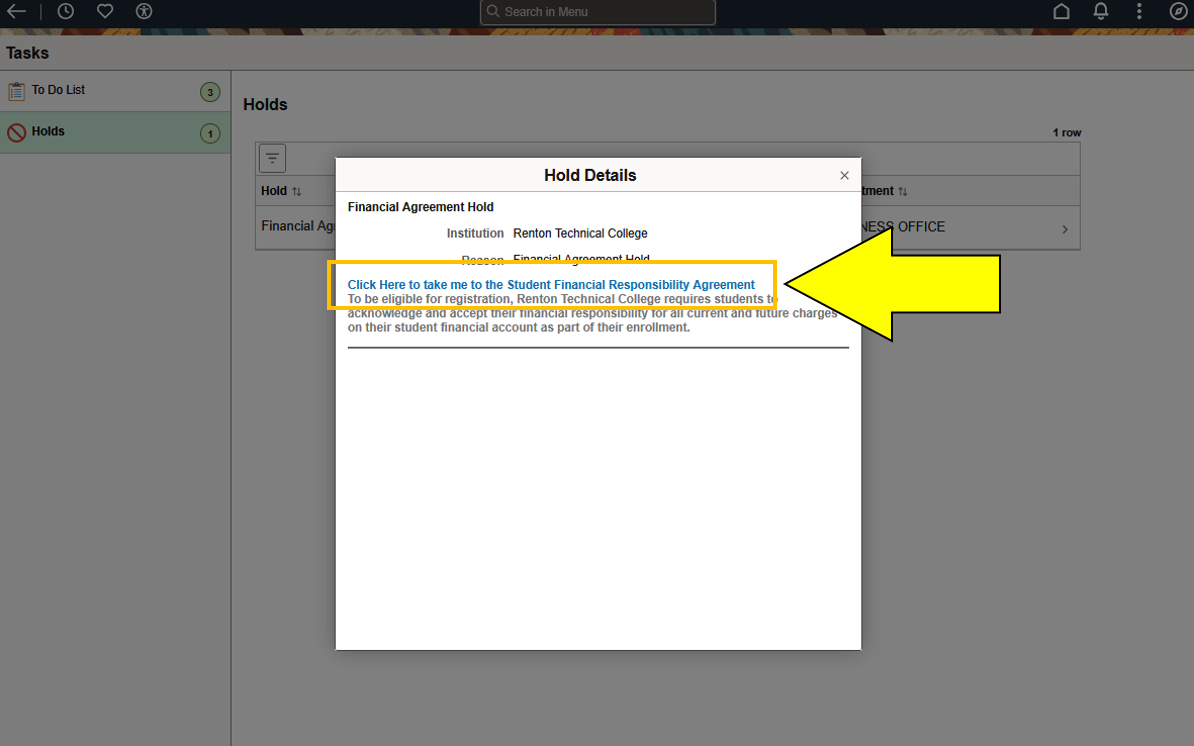
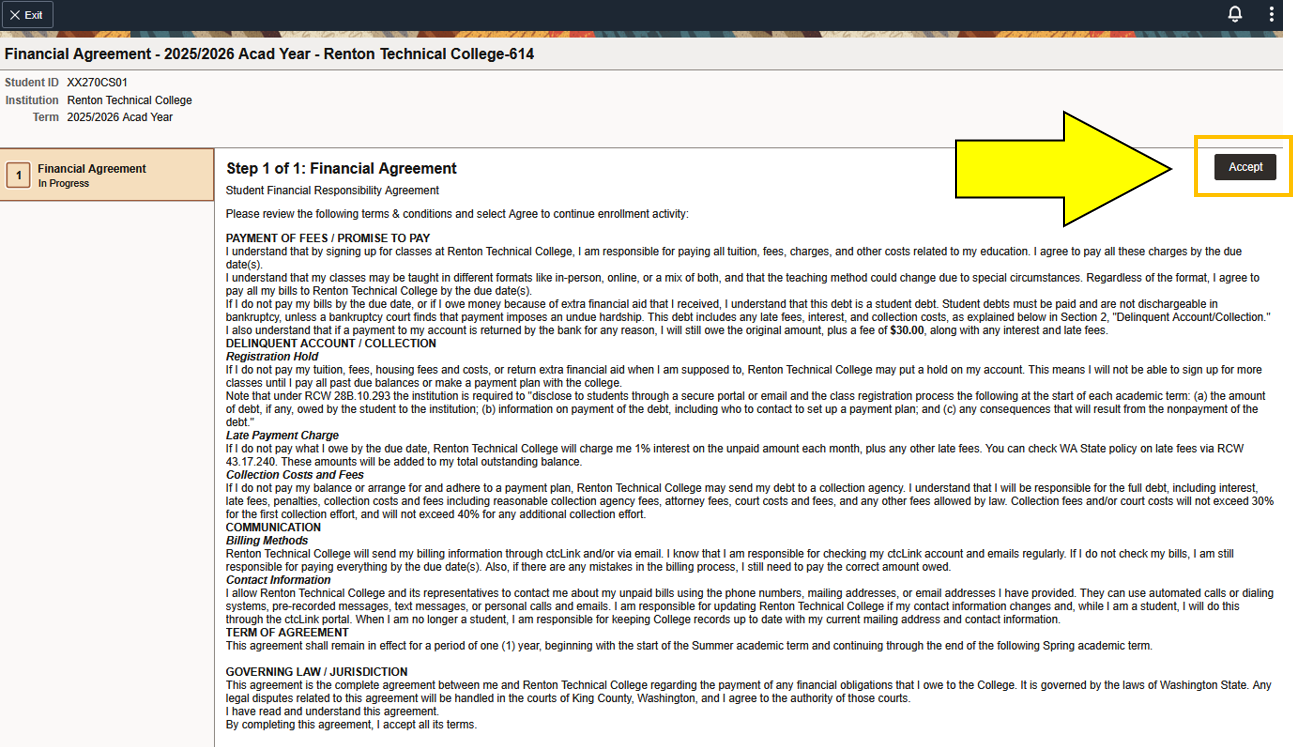
Step 5: Review the agreement information and click Accept in the upper right corner to complete the agreement.
Step 6: A Completed Agreements section will now display on the left menu and the hold will be lifted.
How to Accept SFRA (Mobile)
Step 1: Select My Information on the left side menu.
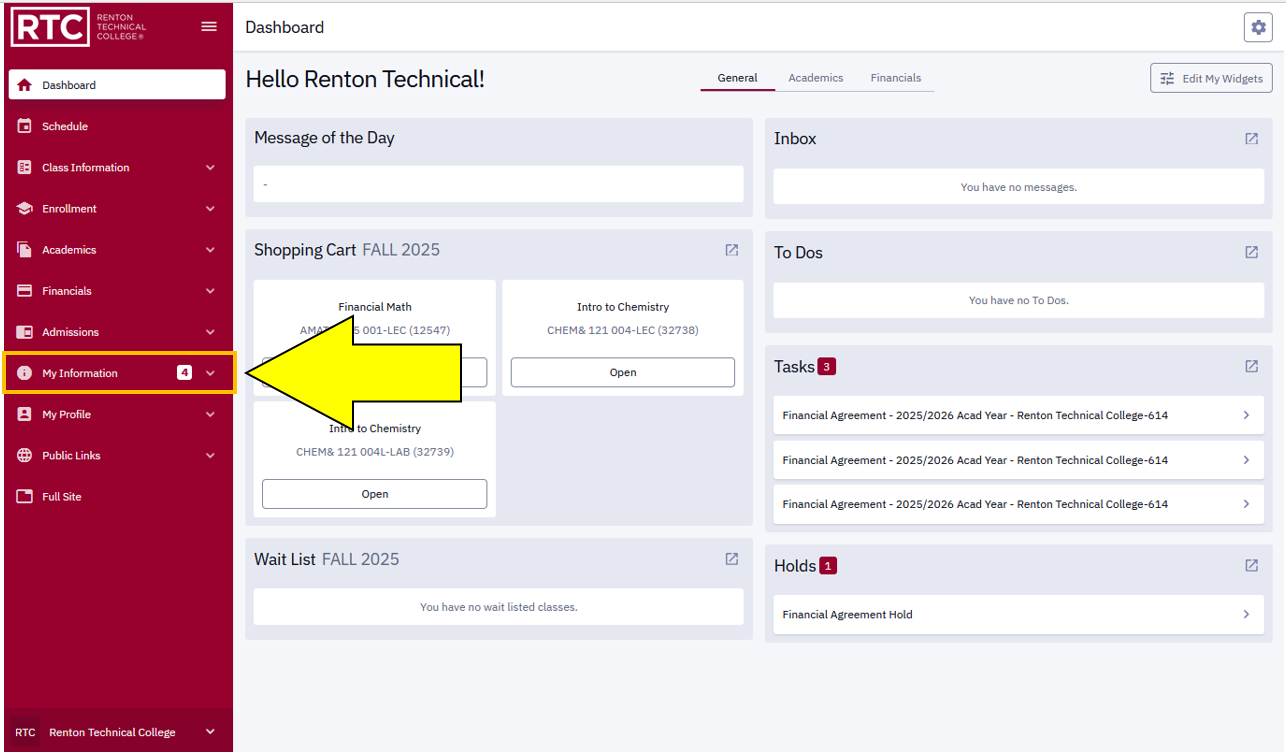
Step 2: Select Holds.
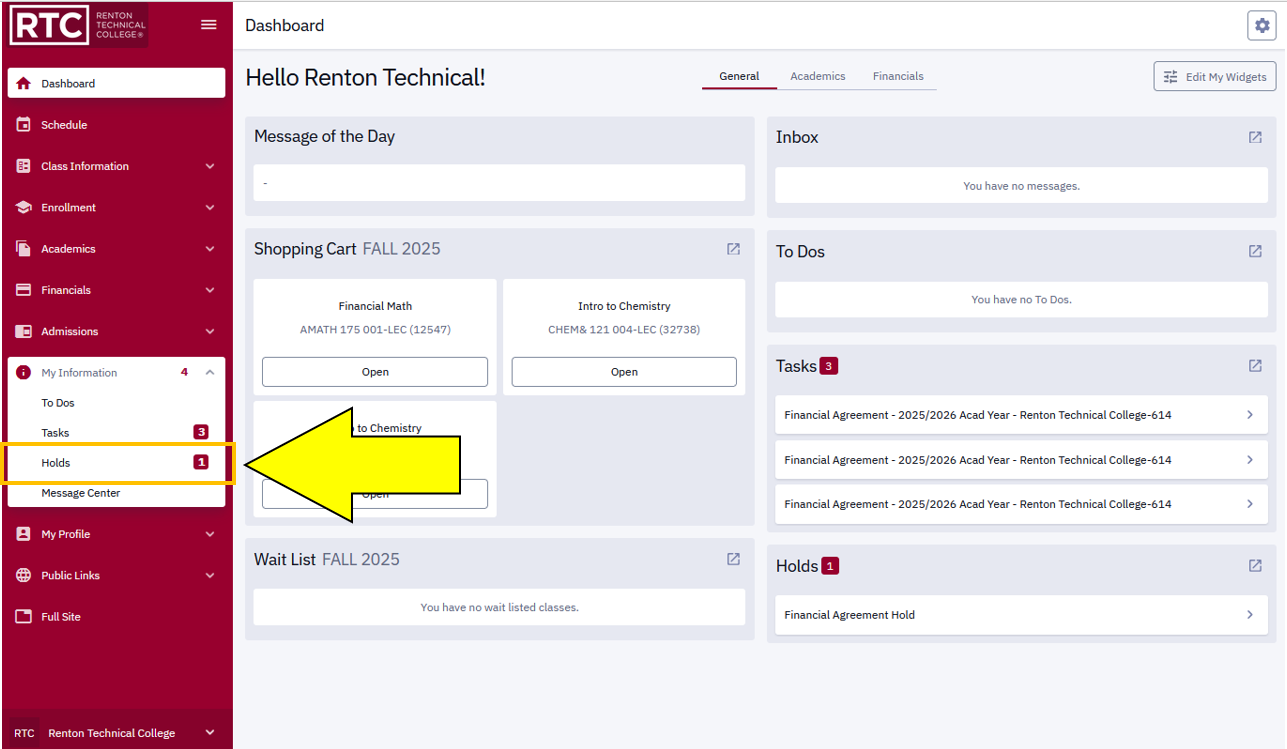
Step 3: Select Financial Agreement Hold.
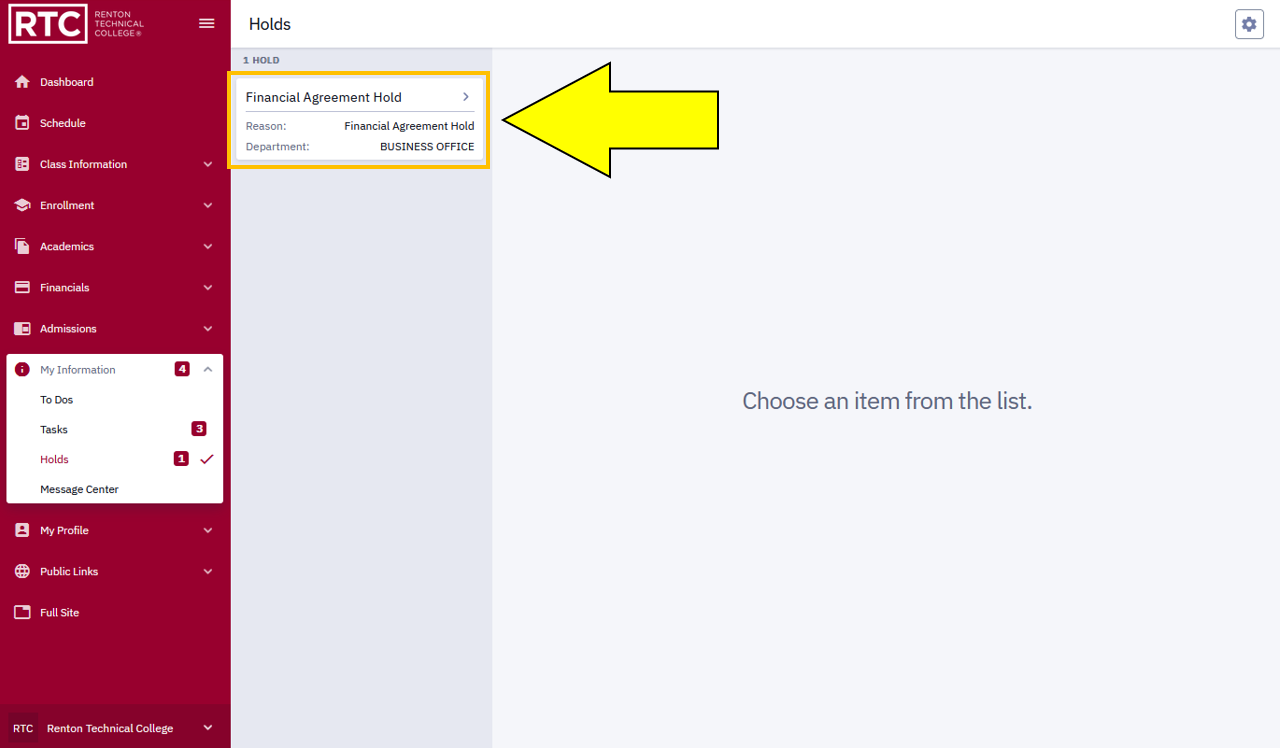
Step 4: Select the Click Here to take me to the Student Financial Responsibility Agreement link.
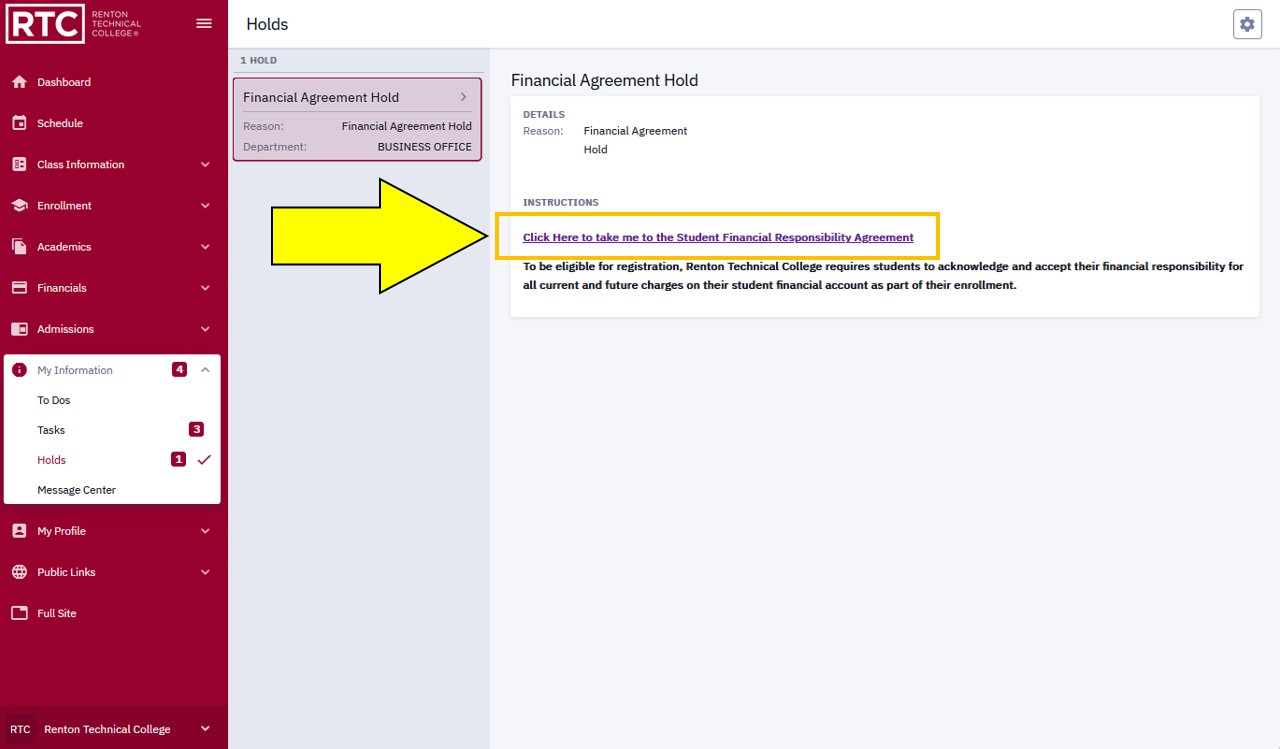
Step 5: Review the agreement information and click Accept in the upper right corner to complete the agreement.
Step 6: A Completed Agreements section will now display on the left menu and the hold will be lifted
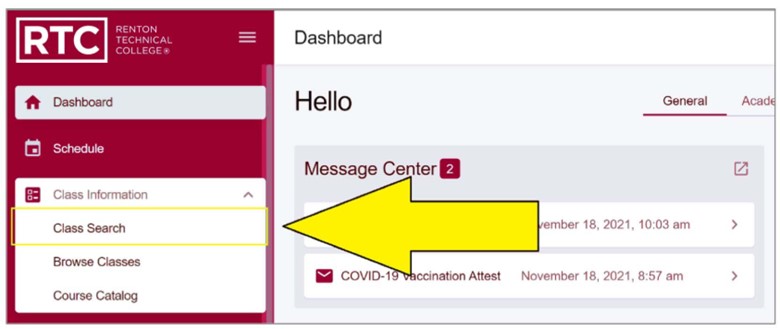
Enroll for Classes by Class Search (Full Site)
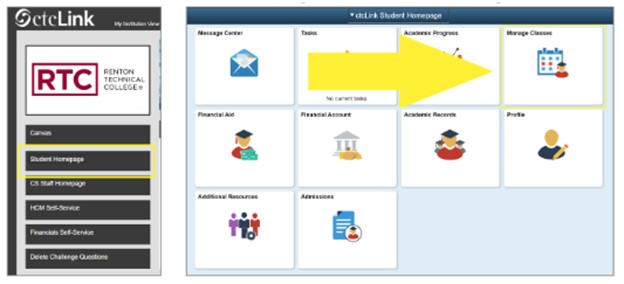
Step 1: Click on Student Homepage and select Manage Classes.
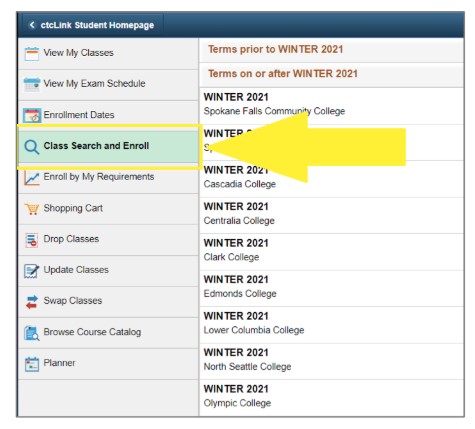
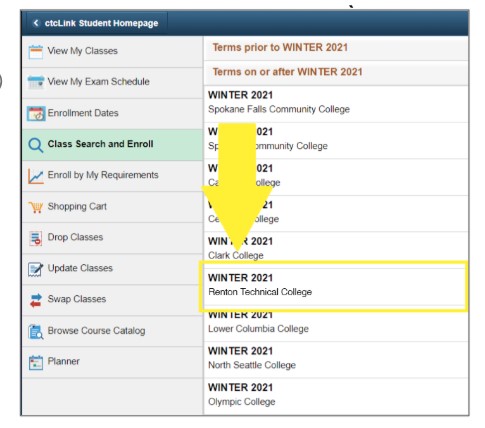
Step 2: On the left select Class Search and Enroll.
Step 3: Select the Term and Institution (Renton Technical College).
Step 4: At the top of the page you can enter a keyword to search for specific classes. Then click on the Search button.
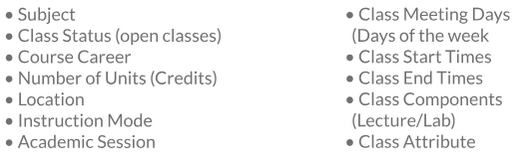
Filters, on the left side various filters will display for you to narrow your search results:
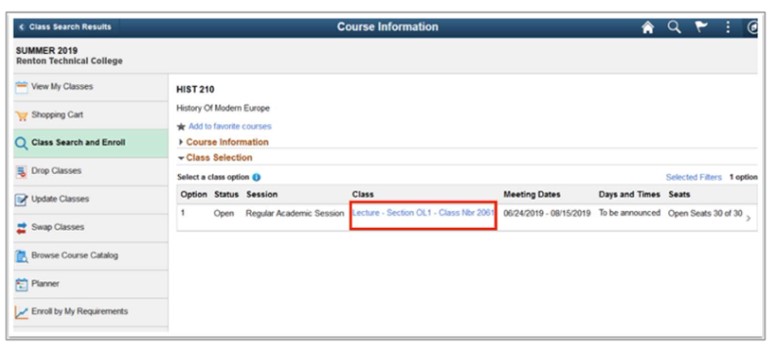
Step 5: Select a Course and the class sections will display.

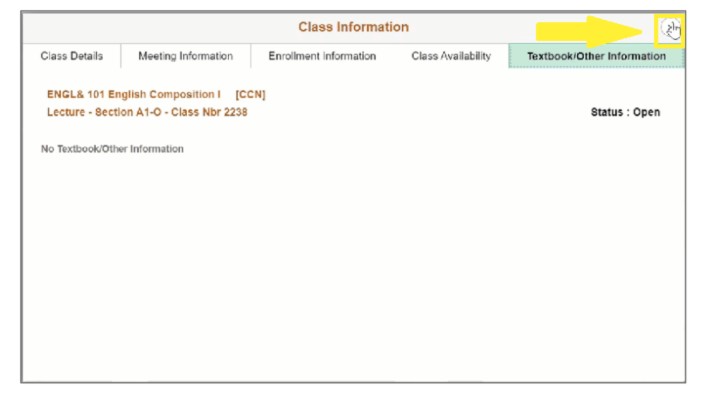
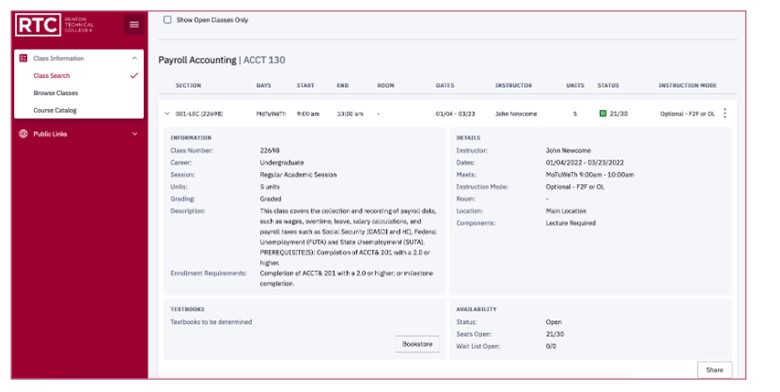
Step 6: Open Class Details, select the Class hyperlink to view details.
Step 7: On the Class Information Window, at the top of the page, you can enter a keyword to search for specific classes. Then click on the Search button.
- Class Details
- Meeting Information
- Enrollment Information
- Class Availability
- Textbook/Other Information

Step 8: Click on the Close (X) button to close the Class Information window.
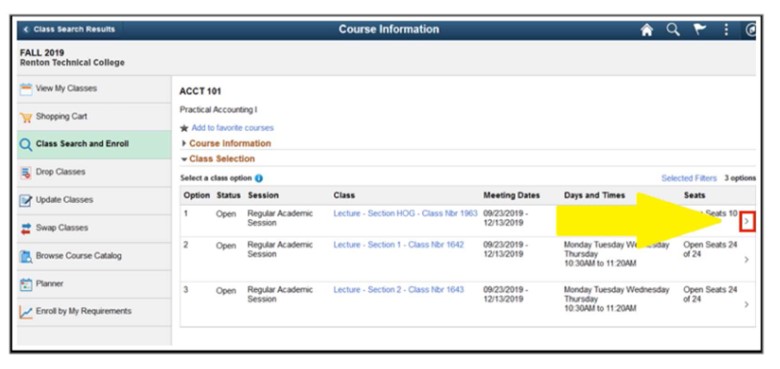
Step 9: To enroll in this class, click on the right arrow (>)
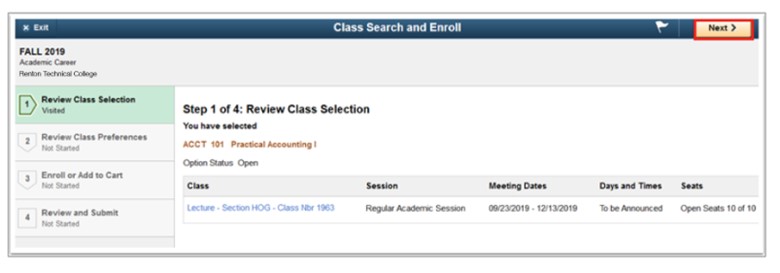
Step 10: The Class Search and Enroll guide displays in Review Class Selection on the left-hand side of the screen. Select the Next link at the top right of the page.
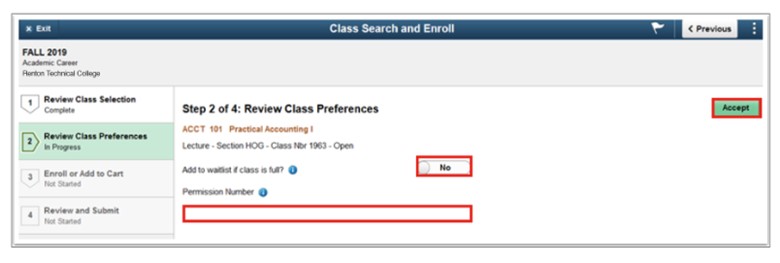
Step 11: The Review Class Preference page will display, input Wait List preference or Permission Number (if applicable) and select the Accept button.
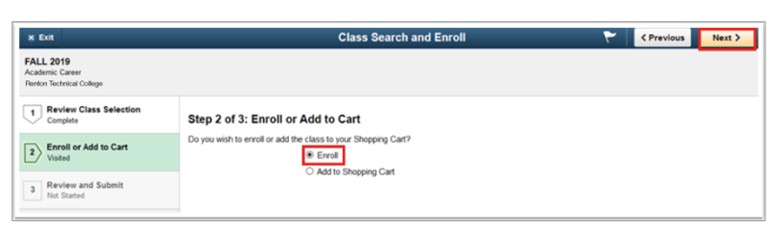
Step 12: The Enroll or Add to Cart page will display, select Enroll then the Next button.
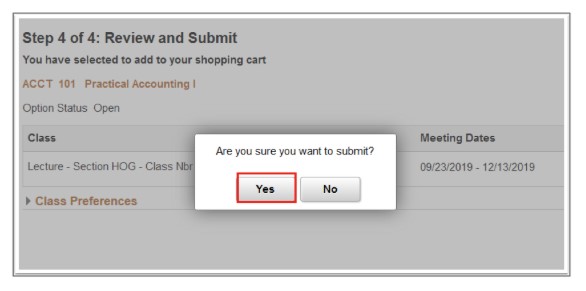
Step 13: The Review and Submit page will display, once you select the Submit button, a submit confirmation page will display.

Step 14: Select the Yes option to confirm submission.
Note: A message bar at the top of the page will appear to confirm the course has been added or errors will display.
Typical errors include not meeting an enrollment requirement, a time conflict, full class, etc.
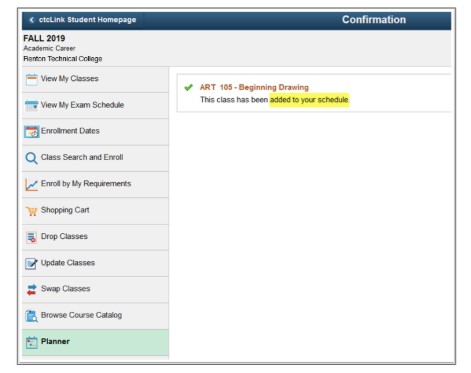
Step 15: Submission Confirmed. The updated Confirmation page will display. Select View My Classes on the left side to confirm that your class has been added.
Enrollment Issues?
If you are experiencing issues with enrolling for classes, first try clearing your internet browser history and try again.
If you are still experiencing issues, please contact Enrollment Services for assistance.
Enroll for Classes by Class Search (Mobile)
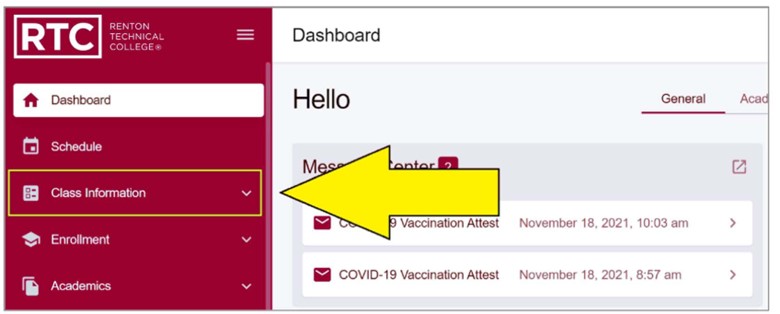
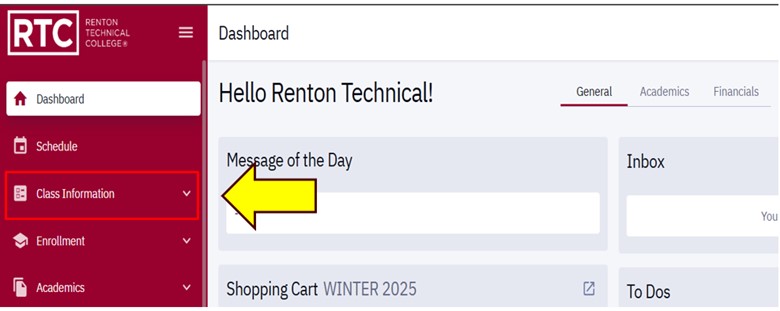
Step 1: Open Class Information on the left, select the Class Information menu
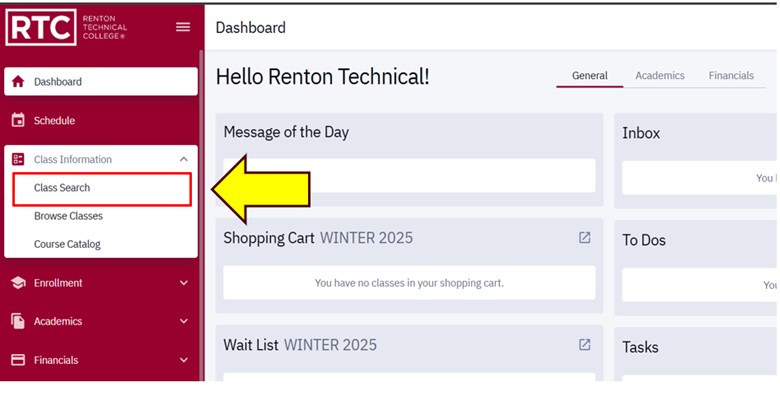
Step 2: Select Class Search on the left, select Class Search
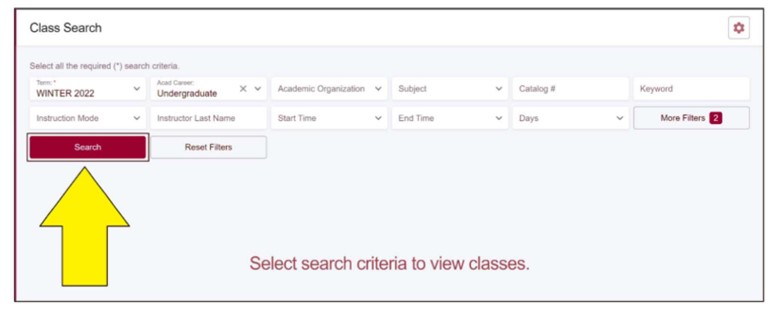
Step 3: Select Term, select the appropriate term using the Term dropdown menu

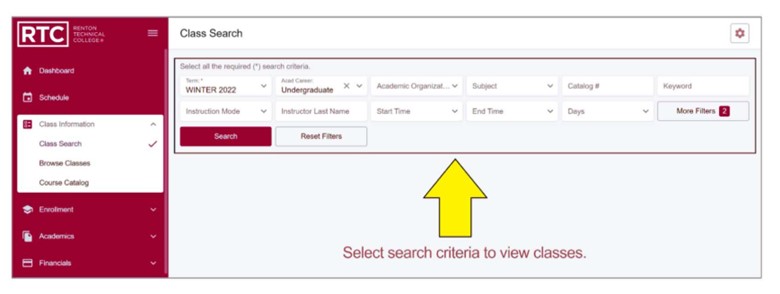
Step 4: Set Search Criteria, use the provided tools to help specify your search criteria.
Step 5: Begin Search, once the search criteria has been set, click on the Search button.
Step 6: Review Search Results, your search results will appear. Click on a listed class to expand the details.
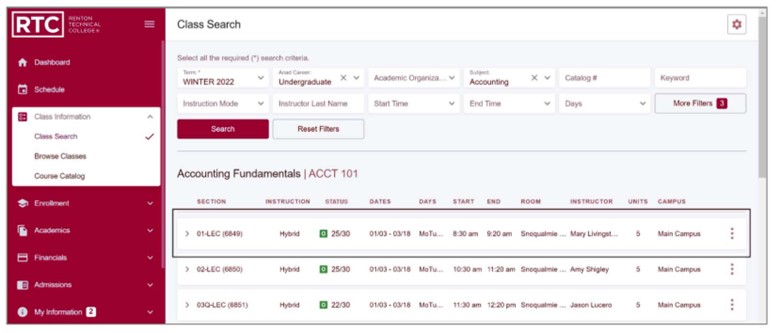
Step 7: Review Search Results
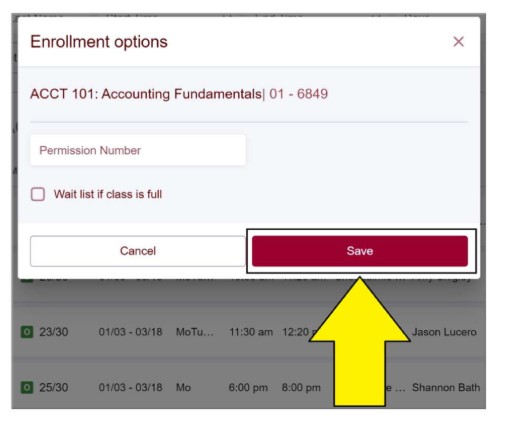
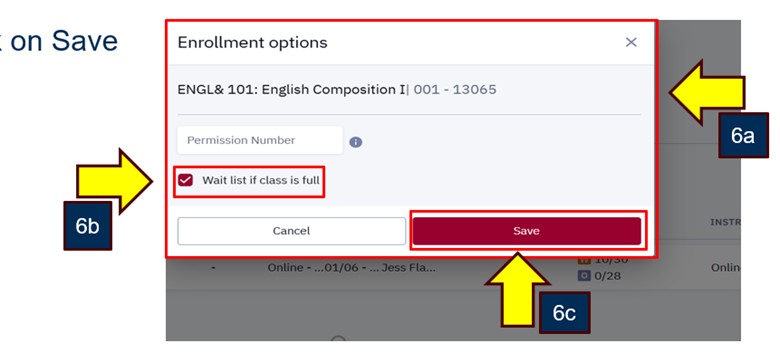
Step 8: Confirm Enrollment, a pop-up will open with Enrollment options. If needed, enter a Permission Number, and check the Waitlist if the class is full if you’d like to be added to the waitlist. Click on Save.
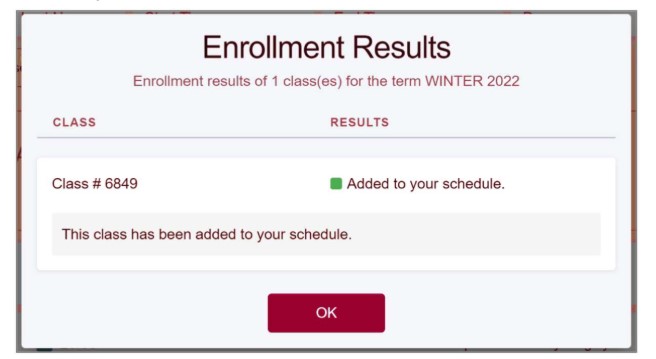
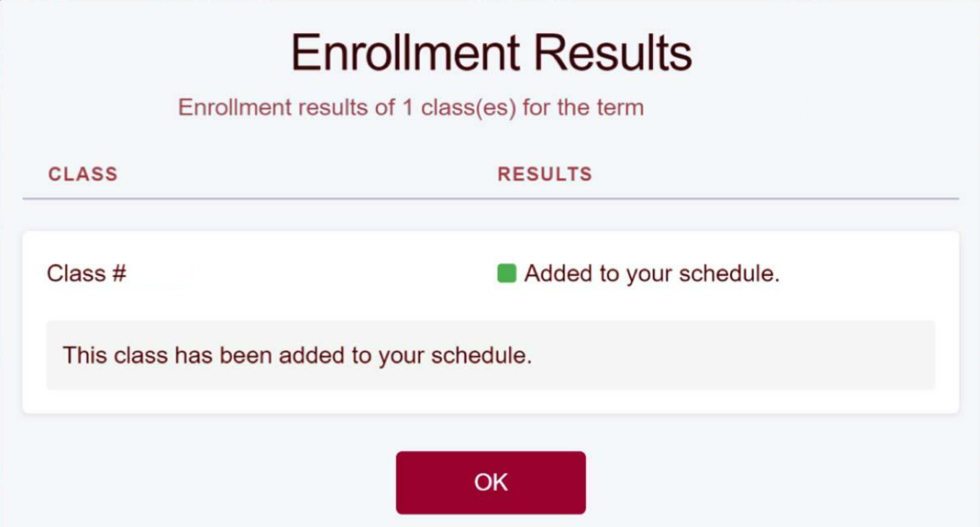
Step 9: Success: If successful, you will see confirmation that the class has been added to your schedule.
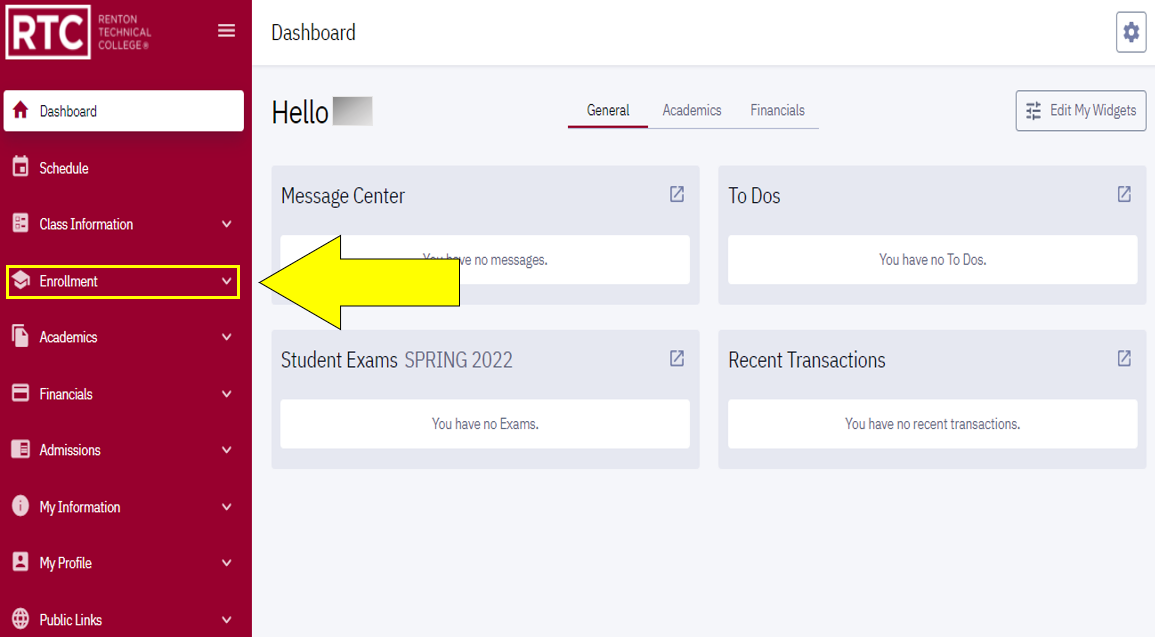
Step 1: Open Enrollment on the left, select the Enrollment menu
Step 2: Select Shopping Cart on the left, select Shopping Cart

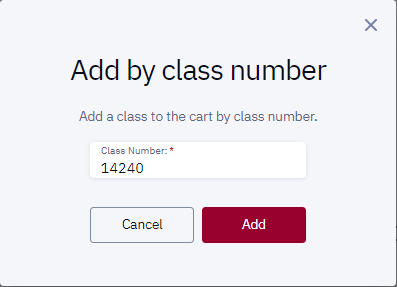
Step 3: Add Class by Class Number on the top right, click Add Class and then Add by Class Number
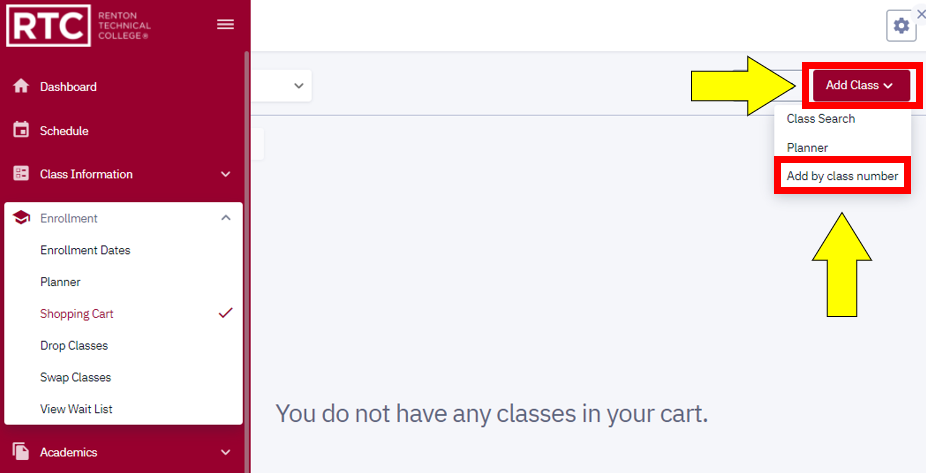
Step 4: Enter Class Number and click Add
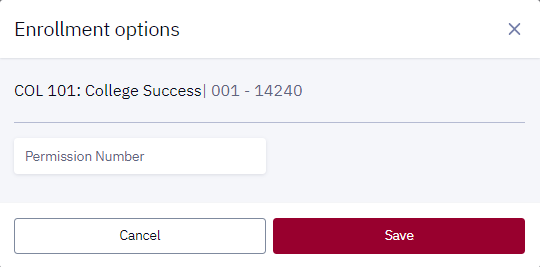
Step 5: Permission Number if a Permission Number is needed for the class, enter the Permission Number and click Save. If not, skip and click Save.
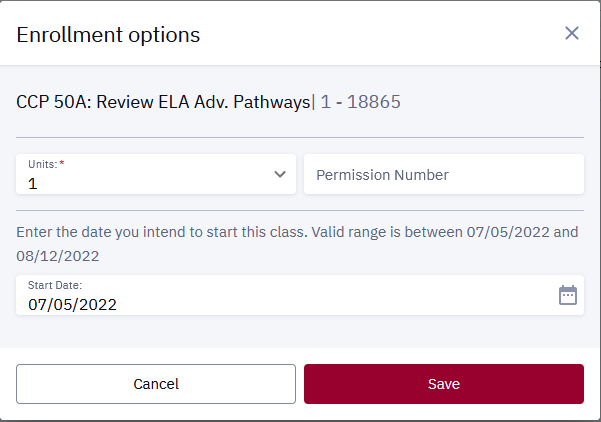
Step 6: Variable Credit Classes, if you are enrolling in a variable credit class, enter the number of units (credits) and start date. Click Save.
Step 7: Class Added to Shopping Cart the Class has been added to your Shopping Cart.
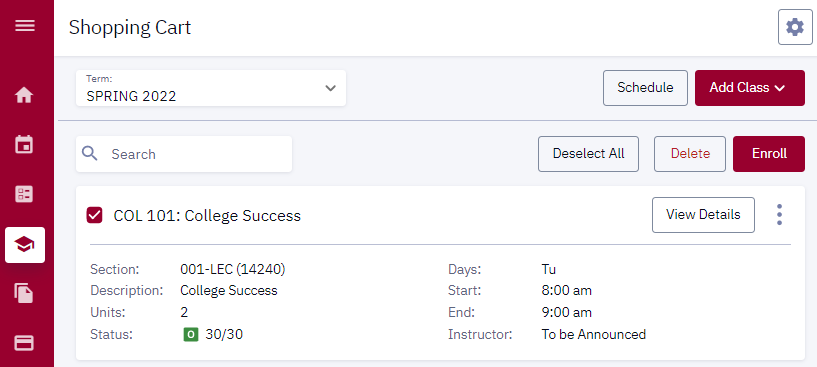
Step 8: Enroll in the Class on the top right, click Enroll.
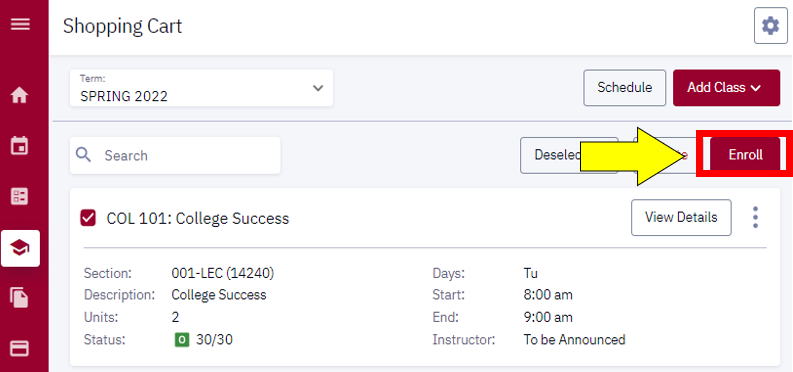
Success: If successful, you will see confirmation that the class has been added to your schedule.
Step 1: Class Information on the left, expand the Class Information menu.
Step 2: Class Search select Class Search.
Step 3: Set Search Criteria
3a. Use the provided tools to help specify your search criteria.
3b. Once the search criteria has been set, click on search button.
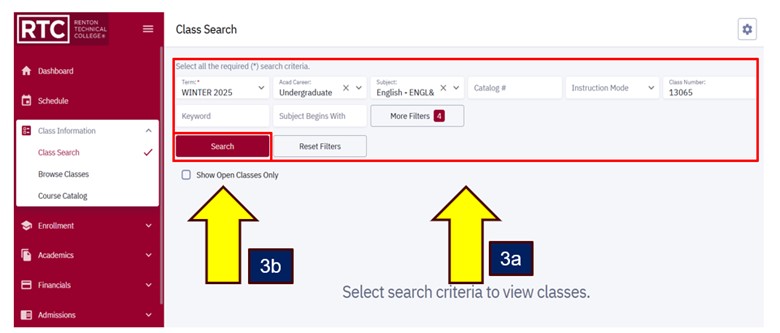
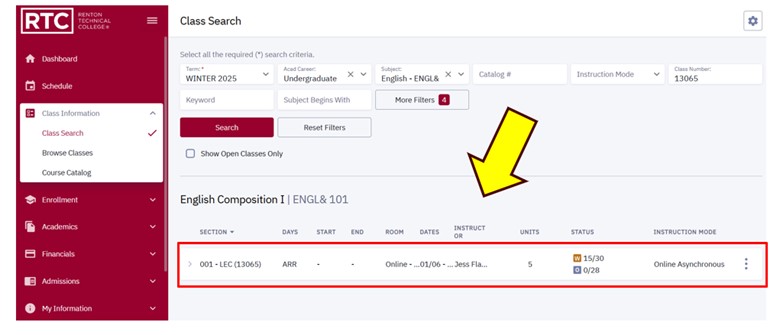
Step 4: Review Search Results your search results will appear. Click on a listed class to expand the details.
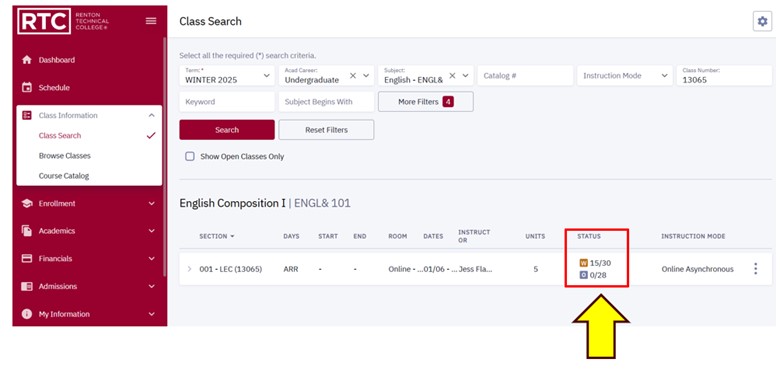
Step 5: Identify Class Status within the details you will see a status of "O" if the class is open to enrollment and a "W" if there is a waitlist.
Step 6: Enroll for the Class to enroll in the selected class, click on the three dots on the right, and select enroll.
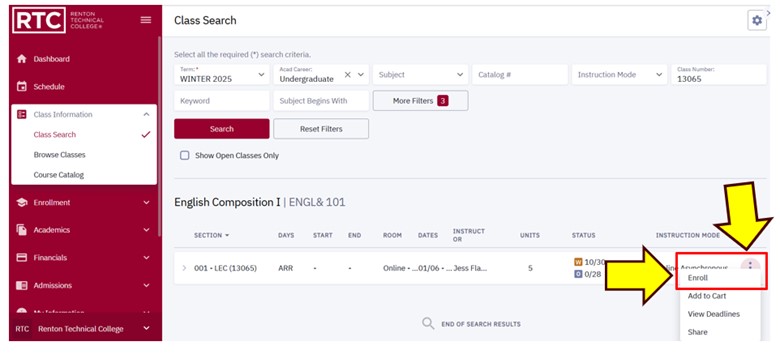
Step 7: Confirm Enrollment & Join Waitlist
7a. A pop-up will open with enrollment options. If needed, enter a Permission Number in the box provided.
7b. Select check-box "Wait list if class is full" to be added to the waitlist
7c. Click on Save
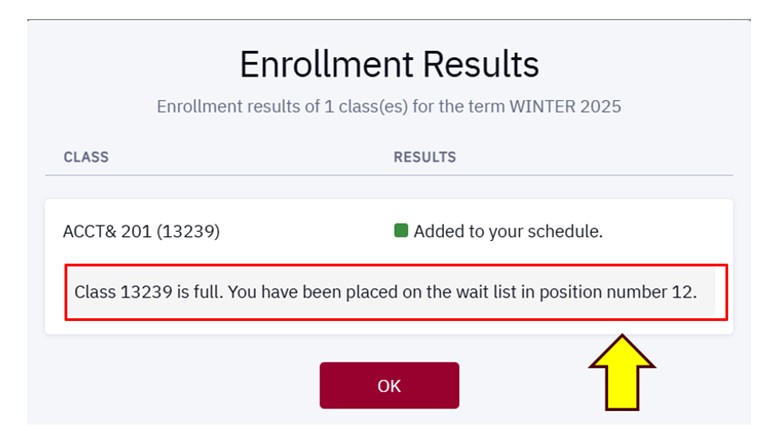
Step 8: Waitlist Results you will see confirmation that you have successfully been added to the class waitlist and your position number.
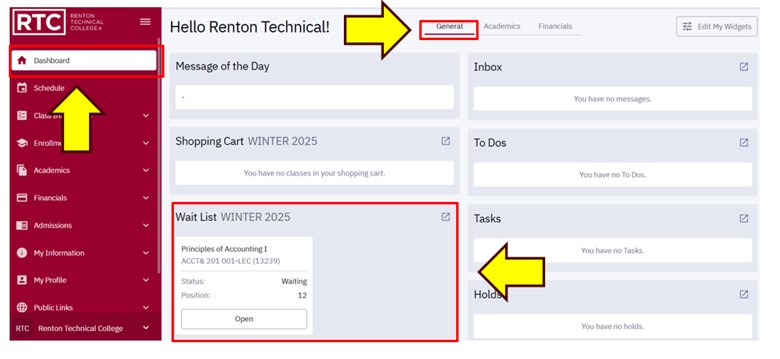
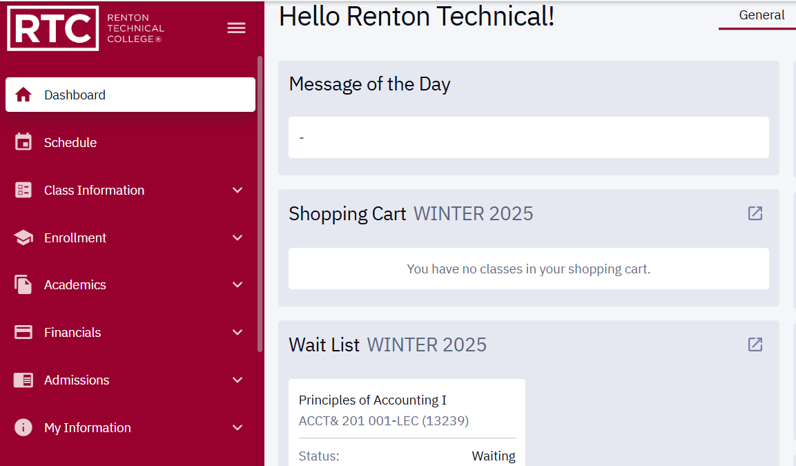
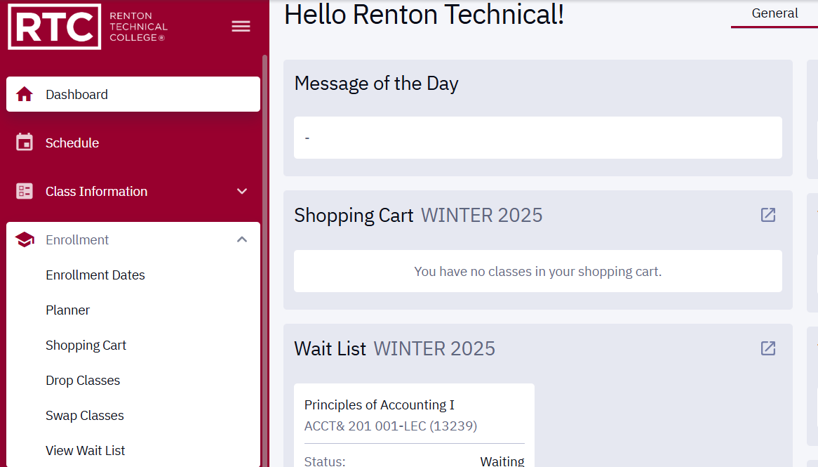
Step 9: Confirm Waitlist you may confirm your class waitlist by selecting Dashboard on the left, and selecting the General tab.
Step 1: Main Page on the left, select Enrollment to expand the menu.
Step 2: Select Drop Classes from the list of options
Step 3: Review Classes—you will now see the list of classes you may drop. Review this list to determine which class(es) you’d like to drop.
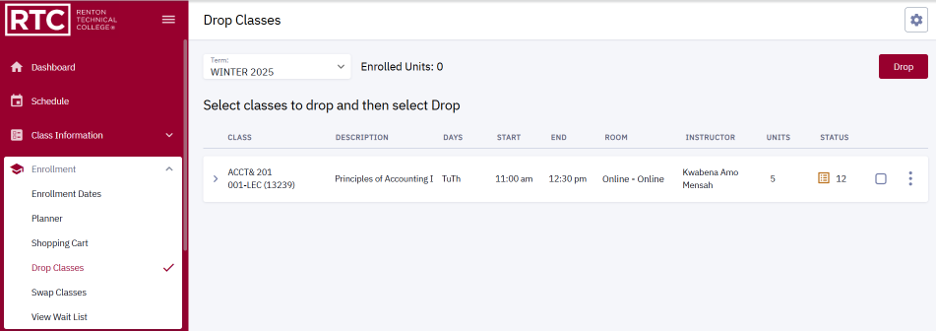
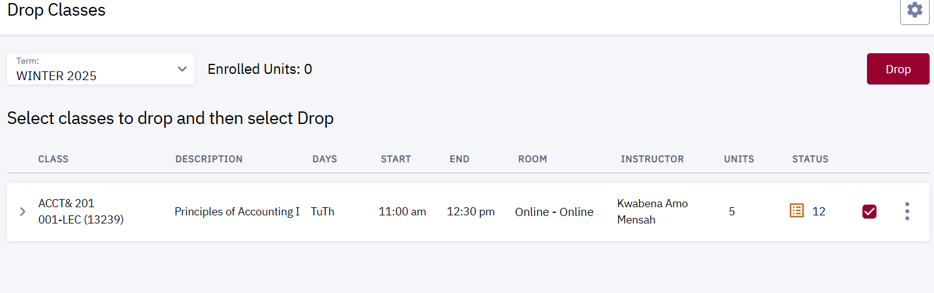
Step 4: Select Classes on the right, select the class(es) you’d like to drop by adding the checkmark.
Step 5: Drop Classes—once you have made your selections, select Drop.
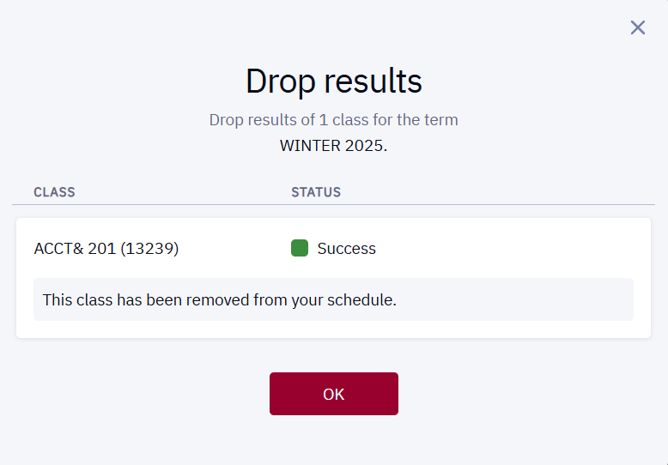
Step 6: Confirm Drop—A popup window will open to inform of drop results. Select OK.
How do I pay for classes in ctcLink (Full Site)?
Step 1: Student Homepage, click on the Financial Accounts title and select Payments.
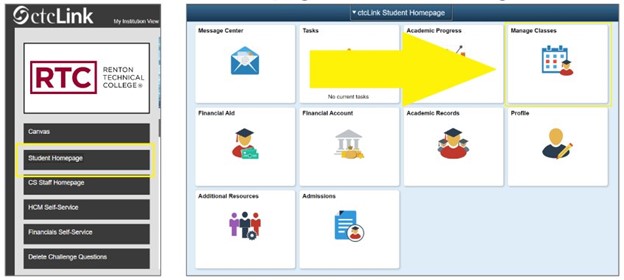
Step 2: Select Make a Payment.
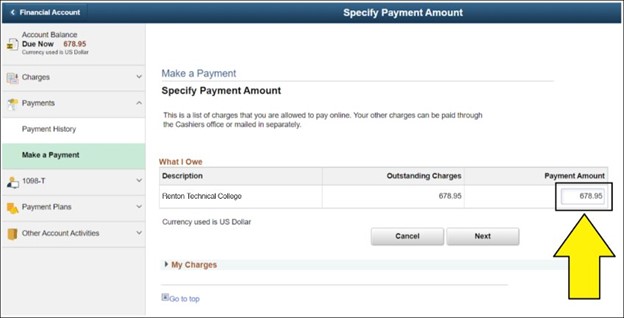
Step 3: Review Amounts Owed
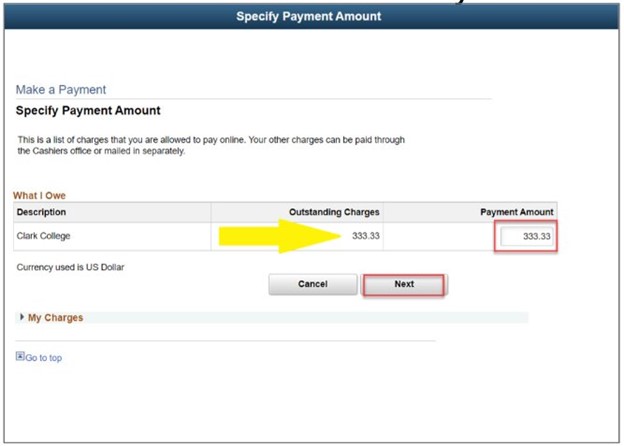
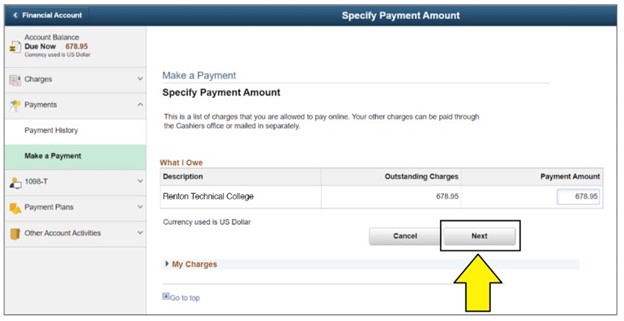
Step 4: Specify Payment Amount, under Payment Amount and click on Next.
Step 5: Confirm Payment, by selecting Continue to Make Payment.
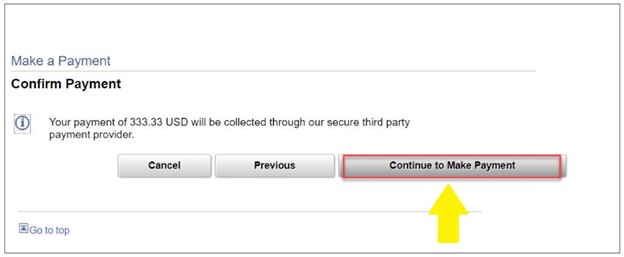
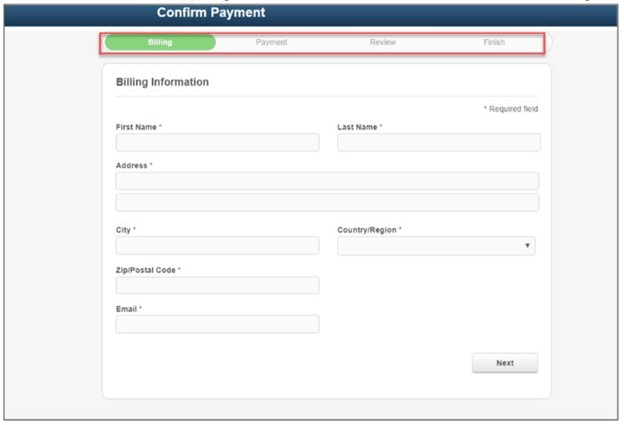
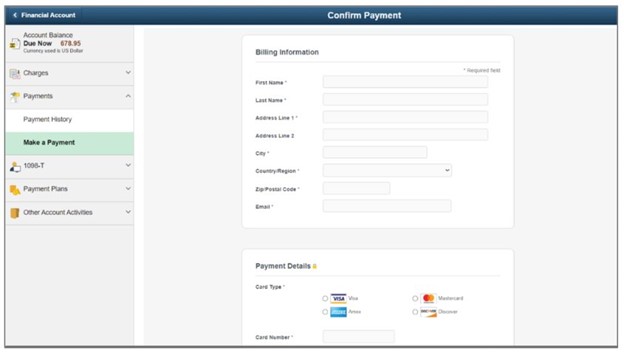
Step 6: Complete the Billing Page, you will be directed to the billing page. Complete each of the tabs to enter your billing information, enter payment, review and submit your payment.
Payment Complete. Congratulation! You now completed a payment on your financial account.
Quick Links:
Unable to Make a Payment on ctcLink?
- Please clear your browser’s Internet history, try a new browser, use a different device, or log into an incognito window.
How do I pay for classes in ctcLink (Mobile)?
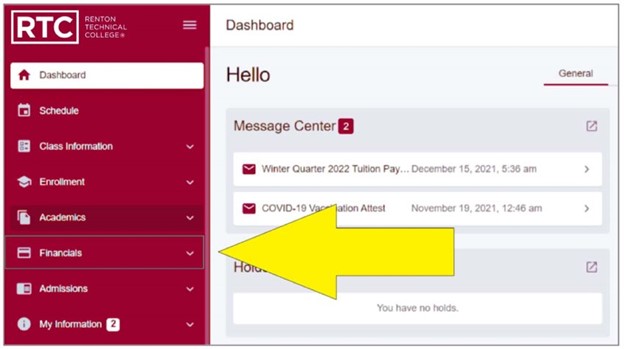
Step 1: Homepage, on the left, expand the Financial menu.
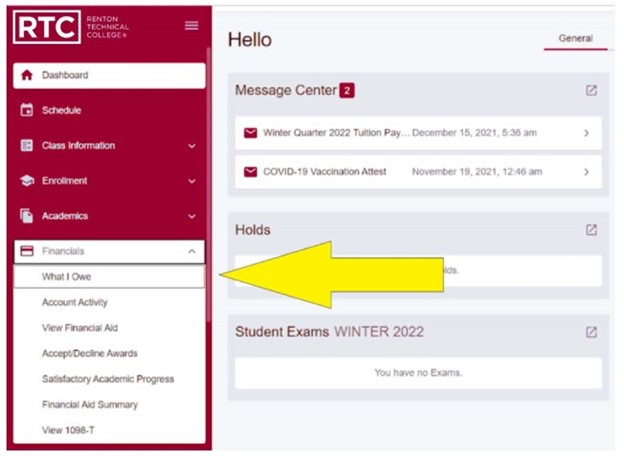
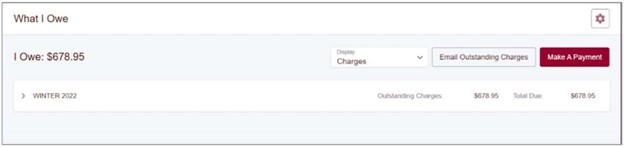
Step 2: Select What I Owe.
Step 3: Review Charges. Your outstanding charges will be displayed. Review the total amount due.
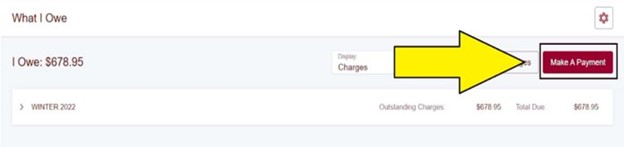
Step 4: Confirm Payment. Click on the Make Payment button on the top-right.
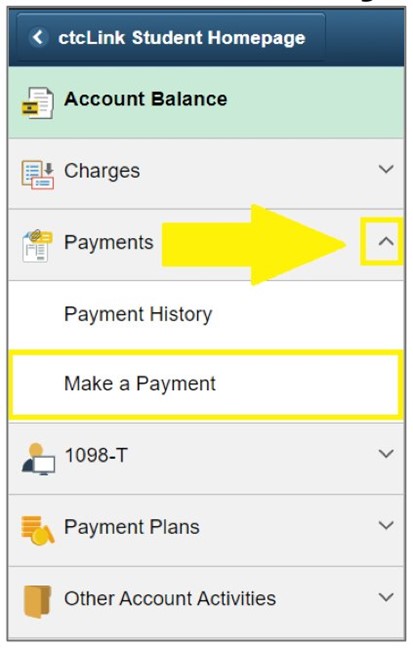
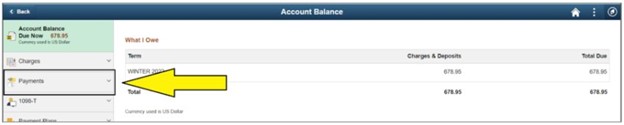
Step 5: Account Balance. You will be brought to the web-view of ctcLink. Click on the Payments menu to expand it.
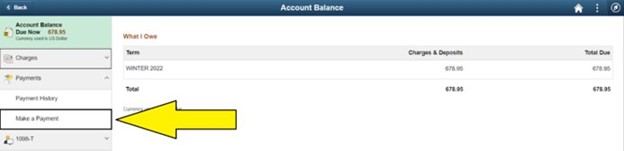
Step 6: Select Make a Payment.
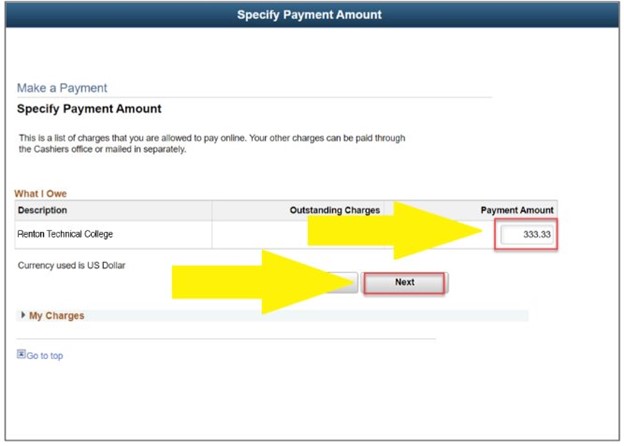
Step 7: Specify Payment Amount. You will be presented with the outstanding charges you can pay online. Under Payment Amount, type in the amount you want to pay.
Step 8: Proceed with Payment. Once you have selected the amount, click on Next.
Step 9: Confirm Payment. Review the payment amount before proceeding. When ready, click on Continue to Make Payment.

Step 10: Enter Billing Information and Payment Details. Click on Next.
Step 11: Confirm Amount and Submit Payment. Make your final review on the payment to be submitted. When ready, click on Submit.
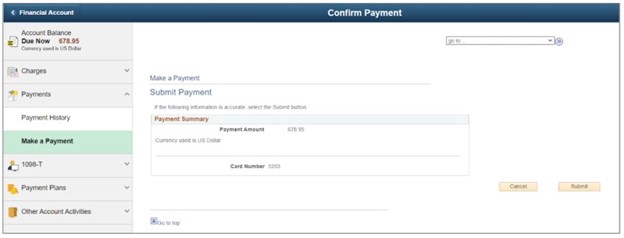
Congratulations! You have successfully completed your payment online.
Step 1: Login Page
Step 2: Select Forget Password, click on Password Help and select Reset Password. 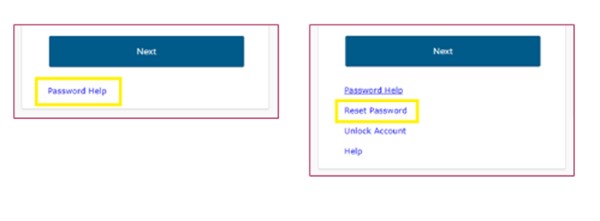
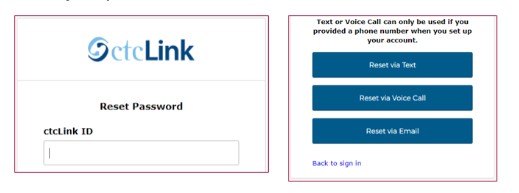
Step 3: Enter ctcLink ID, select your desired method to reset your password.
Step 4: Create New Password, follow the instructions sent to your desired method of communication (Text, Voice Call or Email).
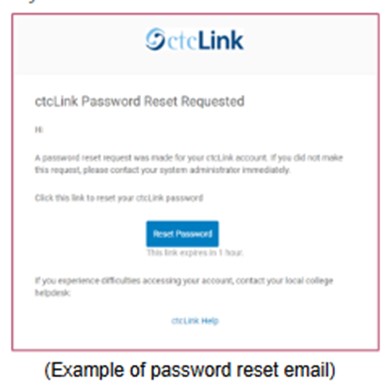
New Password is Ready: your password will be reset right away. Log back in to ctcLink.
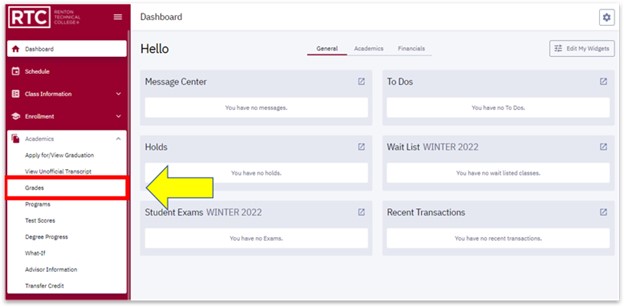
Step 1: Academics on the left, select Academics to expand the menu.
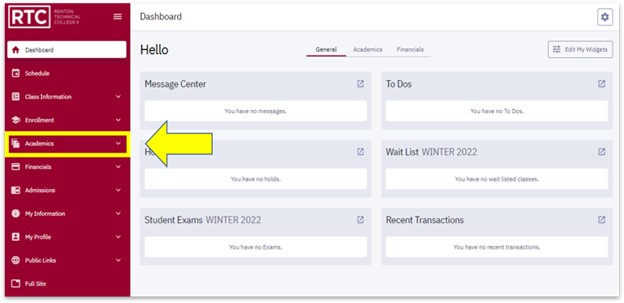
Step 2: Select Grades from the list of options.
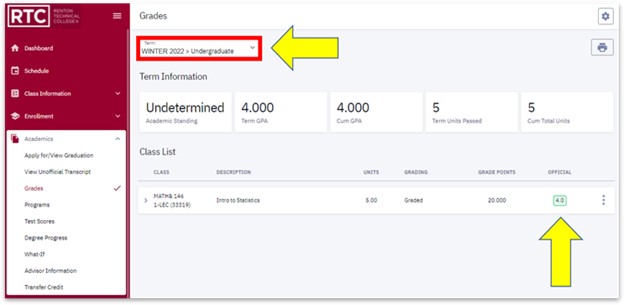
Step 3: Grades Page Displays
At the top select the Term drop-down to look at the applicable Term.
View your class grades under the heading OFFICIAL
How to Update Biographical Information (Full Site)
How to Add a Preferred Name
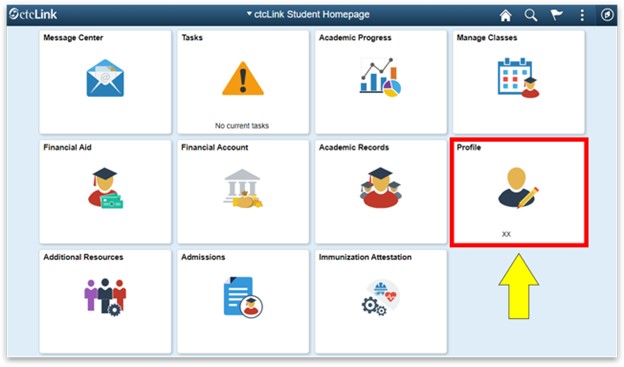
Step 1: On the Student Homepage tile, select My Profile

Step 2: Personal Details
On the right, select (1) Personal Details
At the top, select (2) Personal Tabs
Click on the (3) plus (+) button under Names

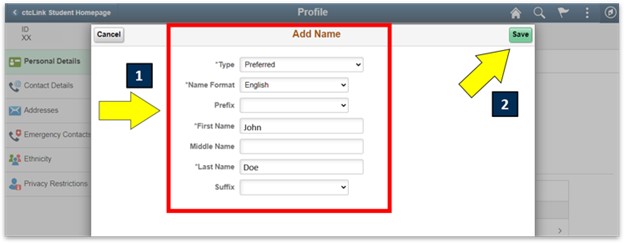
Step 3: (1) Fill in the form and click (2) Save
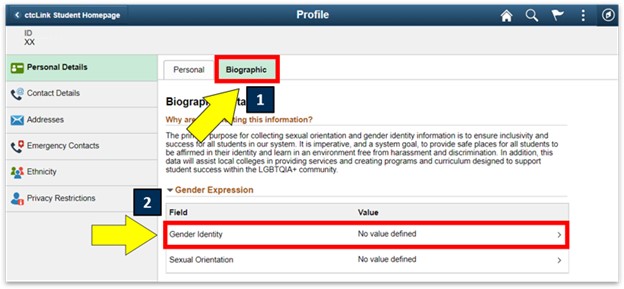
How to Add Gender Identity
Step 4: Adding your Gender Identity
(1) At the top, select the Biographic tab
(2) At the bottom, click on Gender Identity
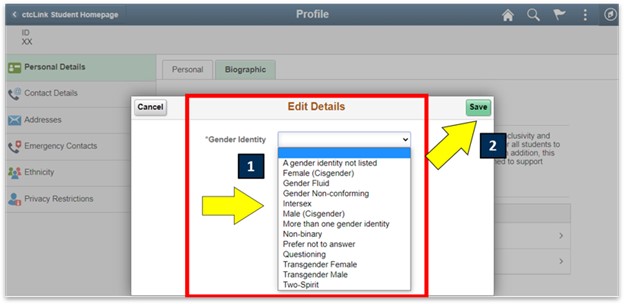
Step 5: Select your (1) Gender Identity and (2) Save
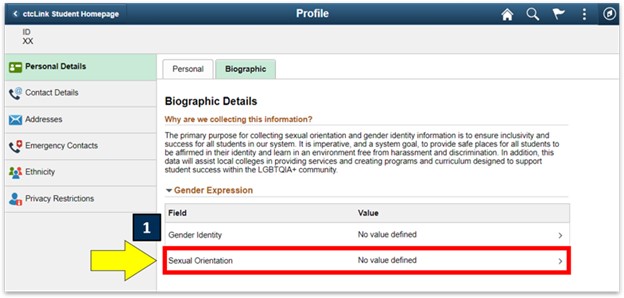
How to Add Sexual Orientation
Step 6: At the bottom, click on (1) Sexual Orientation
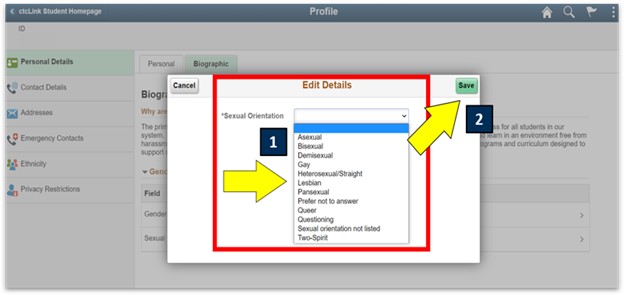
Step 7: Select your (1) Sexual Orientation and click (2) Save
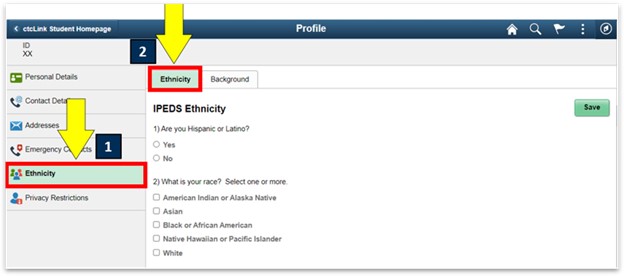
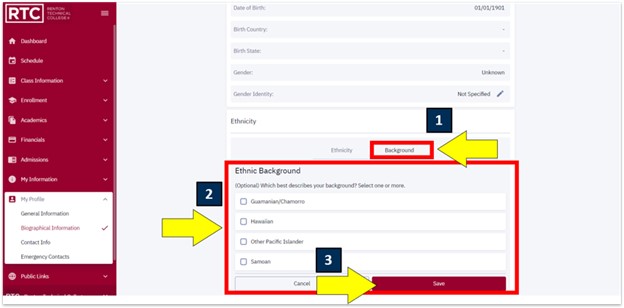
How to Add Your Ethnicity
Step 8:
On the left, select (1) Ethnicity
At the top, select the (2) Ethnicity tab
Fill out the form and click (3) Save
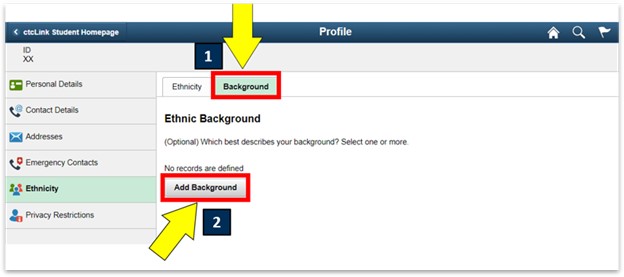
Step 9: At the top, select (1) Background tab
Click on the Add Background button
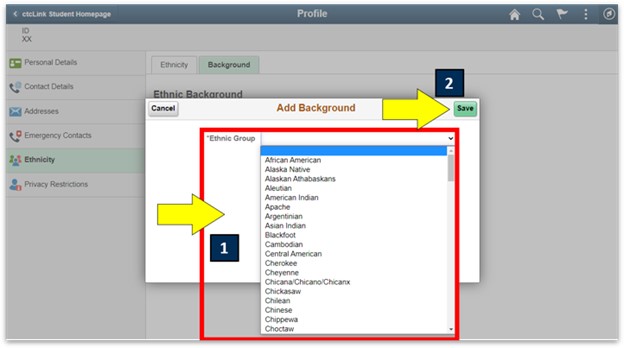
Step 10: Select your (1) Ethnic Group and (2) Save
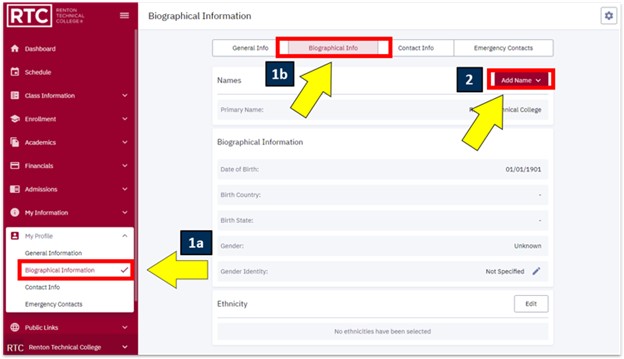
How to Update Biographical Information (Mobile Site)
How to add a Preferred Name
Step 1: My Profile on the left, select My Profile menu
Step 2: Biographical Information
Select Biographical Information (1a) on the left or (1b) top of the screen
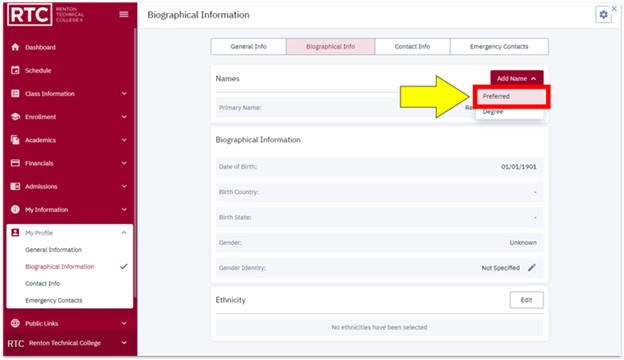
Click the (2) Add Name button
Step 3: Select Preferred
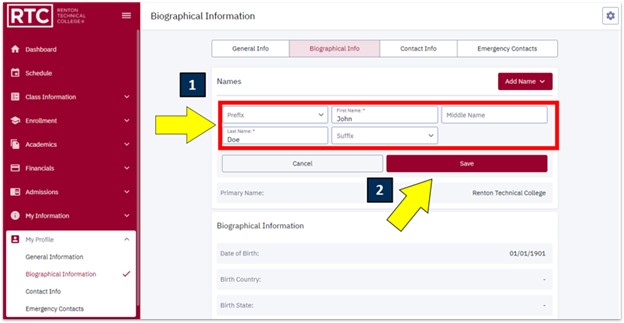
Step 4: Adding a Preferred Name
1. Type First Name and Last Name
2. Click Save
How to add Gender Identity
Step 5: Click on the pencil icon next to Gender Identity
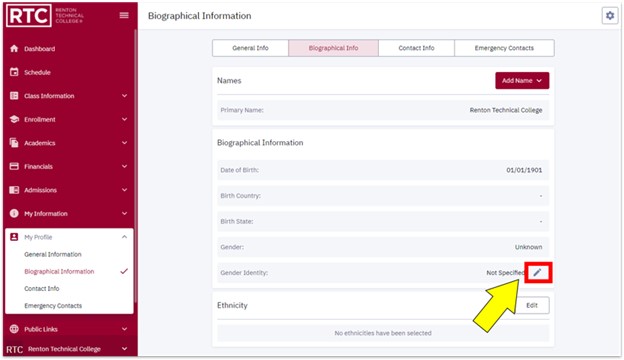
Step 6: Select your (1) Gender Identity and click (2) Save

How to add Ethnicity
Step 7: Click on the Edit button next to Ethnicity

Step 8: In the Ethnicity tab, (1) fill in the form and click (2) Save
Step 9: In the Background tab, (1) fill in the form and click (2) Save
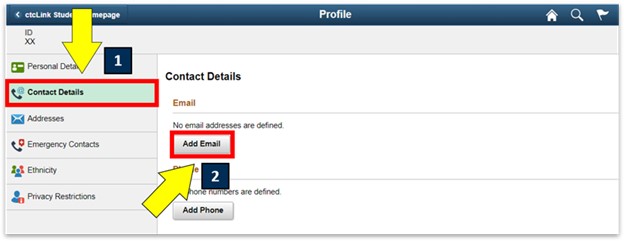
How to Update Contact Info (Full Site)
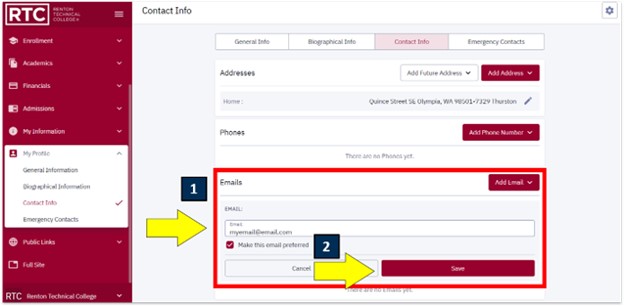
Adding an Email Address
Step 1: On the Student Homepage, select the Profile title

Step 2: On the left, select Contact Details. Click on the Add Email button under Email
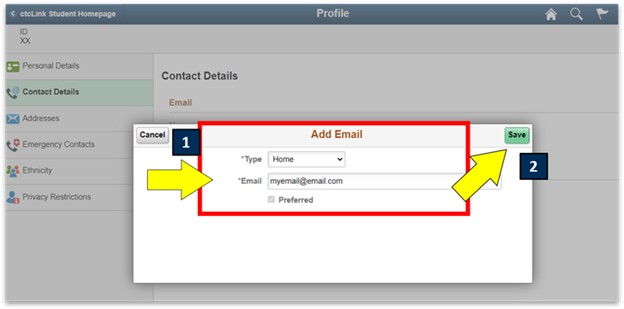
Step 3: (1) Fill in the form and (2) click Save
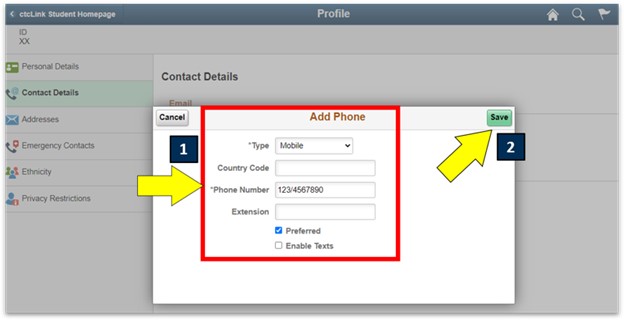
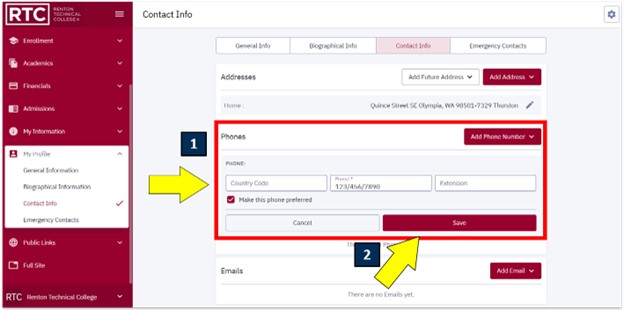
Adding a Phone Number
Step 4: Click on Add Phone button under Phone
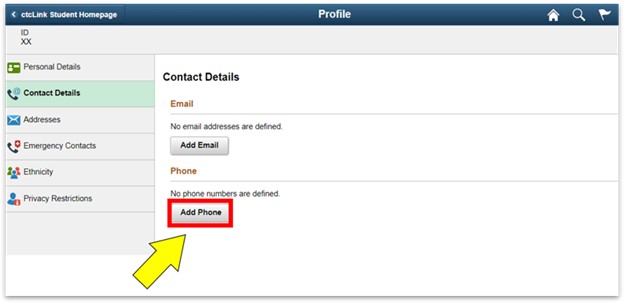
Step 5: (1) Fill in the form and click (2) Save
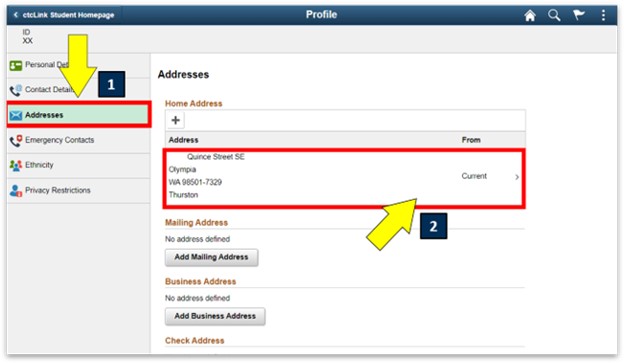
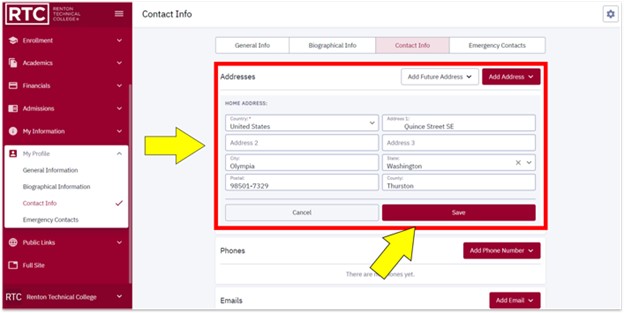
Updating an Address
Step 6: On the left, select (1) Addresses
Click on the (2) Address you want to update
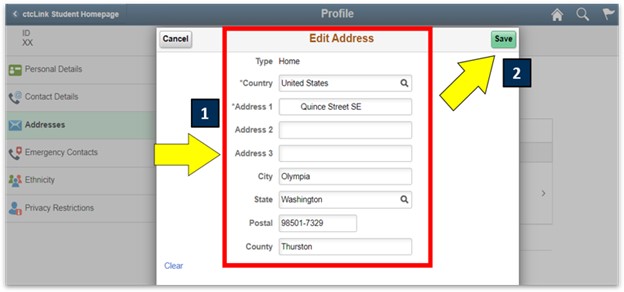
Step 7: (1) Fill in the form and click (2) Save
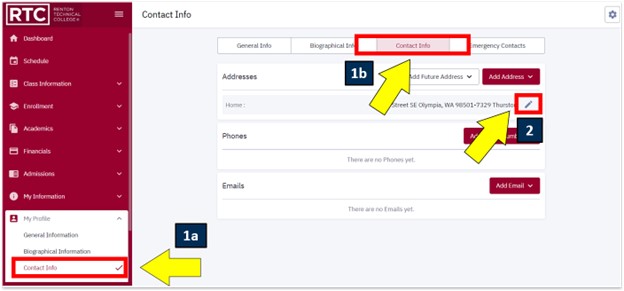
How to Update Contact Info (Mobile)
Updating your Address
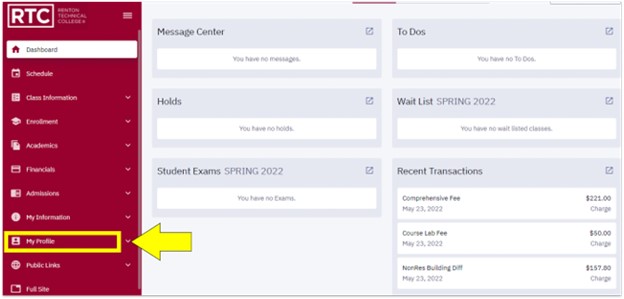
Step 1: My Profile on the left, select My Profile menu

Step 2: Select (1a) Contact Info on the left or (1b) top of the screen
Click on the (2) pencil icon next to your Address
Step 3: Fill in the form and click Save
Adding a Phone Number
Step 4: Click on the (1) Add Phone Number button
(2) Fill in the form and click Save
Adding an Email Address
Step 5: Click on the (1) Add Email button
Fill in your email address. Select (2) Preferred
Click (3) Save
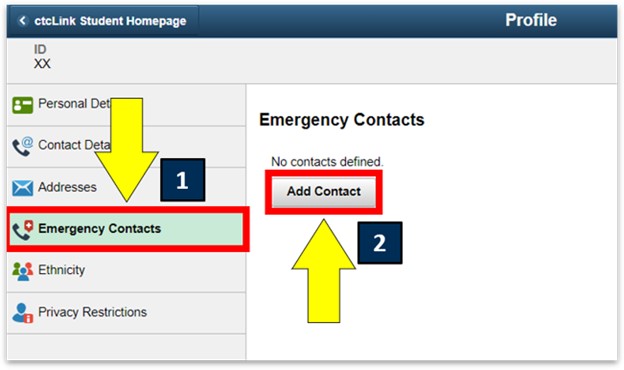
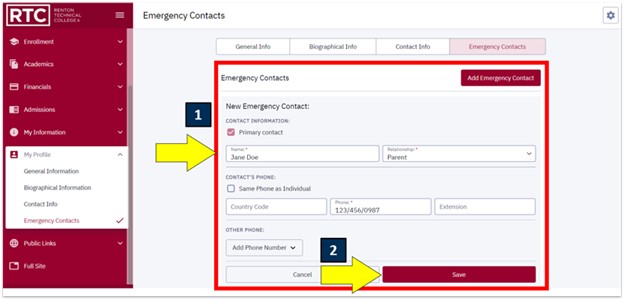
How to Update Emergency Contacts (Full Site)
Step 1: On the Student Homepage title, select My Profile
Step 2: On the left select (1) Emergency Contacts. Click on the (2) Add Contact button
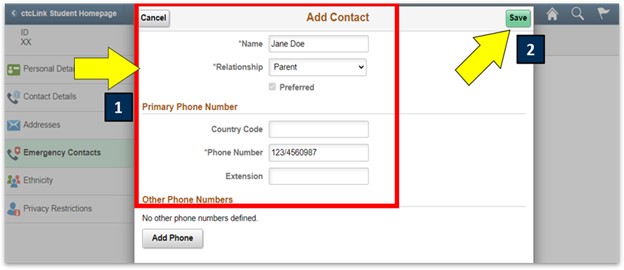
Step 3: (1) Fill in the form and click (2) Save
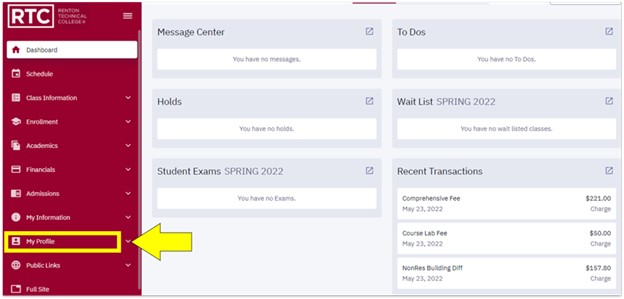
How to Update Emergency Contacts (Mobile)
Step 1: On My Profile, select the My Profile on the left
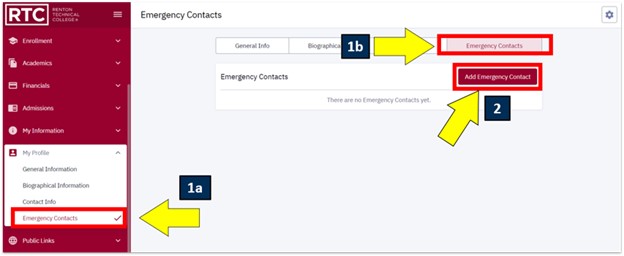
Step 2: Select (1a) Emergency Contacts. On the left or (1b) top of the screen. Click on the (2) Add Emergency Contact button
Step 3: (1) Fill in the form and click (2) Save
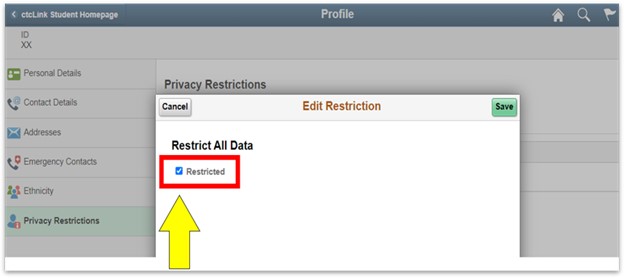
Step 1: On the Student Homepage, select the My Profile title.

Step 2: On the left, select (1) Privacy Restrictions. Click on the (2) Explain hyperlink to read more info
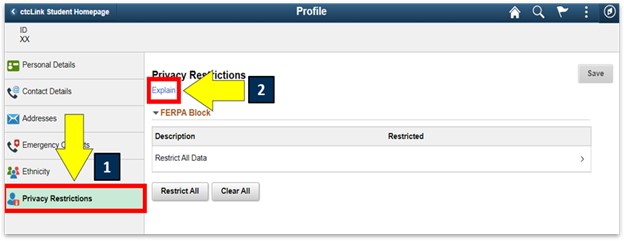
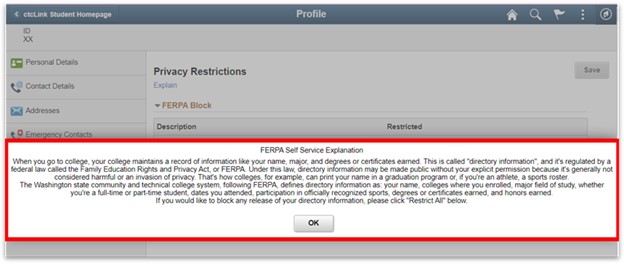
Step 3: The FERPA Self Service Explanation pops up, read and click OK.
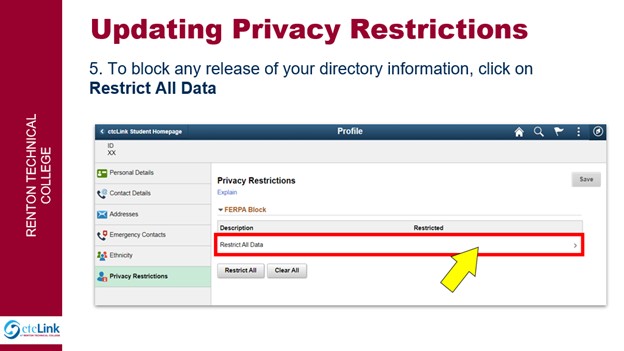
Step 4: To block any release of your directory information, click on Restrict All Data.
Step 5: Check the Restricted box and click Save.
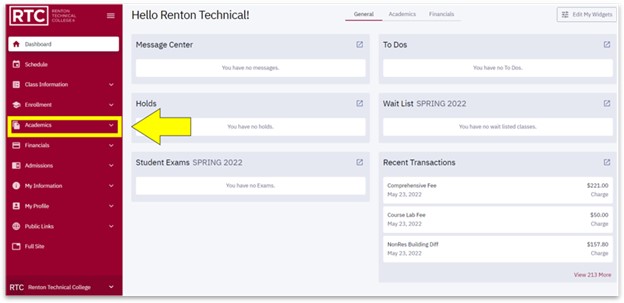
How to View Academic Progress (Full Site)
Step 1: On the Student Homepage, select Academic Progress
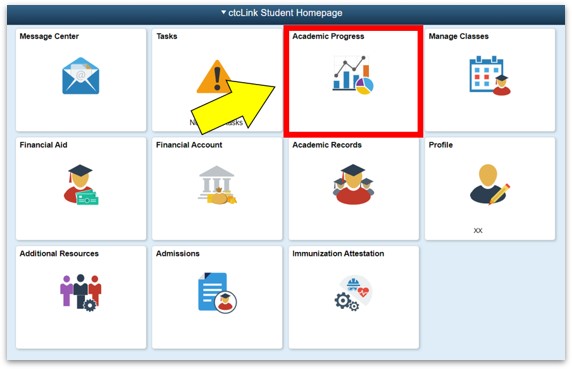
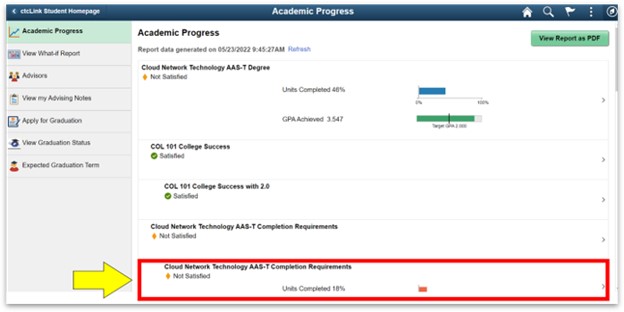
Step 2: Your program credential will appear. The different requirement categories are Satisfied or Unsatisfied. Each category has different credit and course requirements. Click on the Requirement Category to get more info.
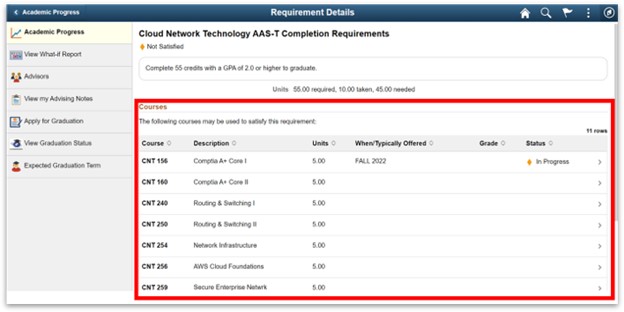
Step 3: The Requirement Category Details, a list of courses that meet the requirements, also show. The status of each course is indicated. You can use this to see which courses you will need to take.
How to View Academic Progress (Mobile)
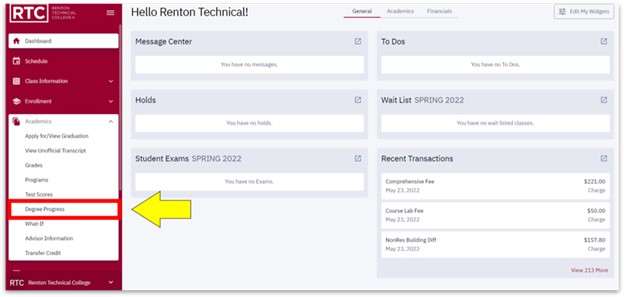
Step 1: On Academics, on the left, select the Academics menu.
Step 2: Select Degree Progress.
Step 3: Your Program Credential(s) will appear with a pie chart showing the percentage complete. Click on your Program Credential.
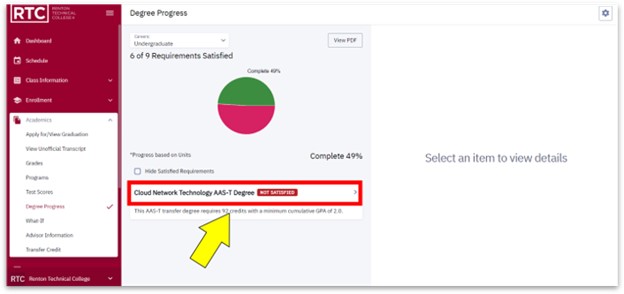
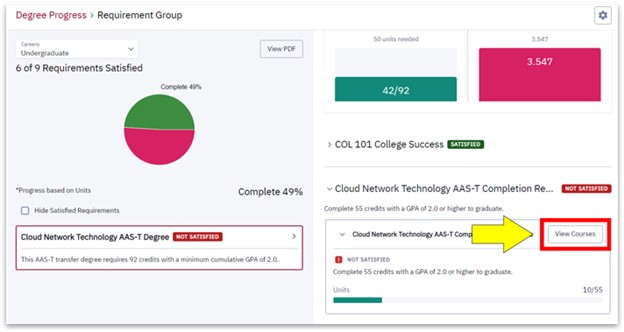
Step 4: The different requirement categories display to the right. You can see if the Requirement Category is Satisfied or Unsatisfied. Each category has different credit and course requirements. Click on a Requirement Category to get more info.
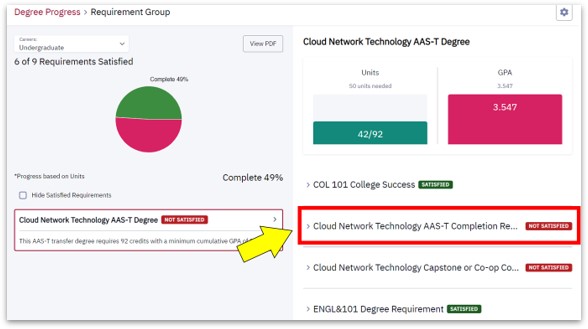
Step 5: More info will expand below. You can see how many credits are needed. Click on the Specific Requirement for details of your progress.
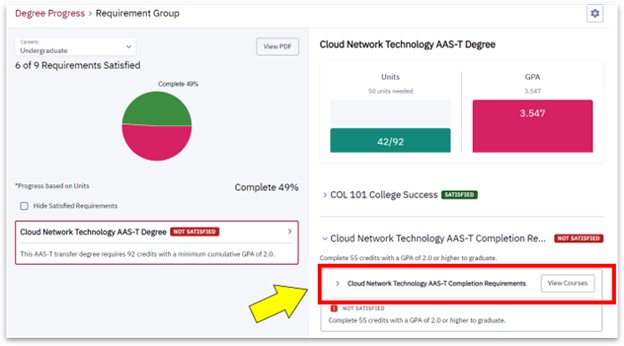
Step 6: Click on the View Courses button to see the courses that meet the requirement.
Step 7: Courses that Meet Requirement, the list of courses that meet the requirement appears. The status of each course is indicated. You can use this to see which courses you still need to take.

ctcLink Mobile Site
Once you have activated your ctcLink account on the full site, you can use a free app on your mobile device or this user-friendly desktop version of the mobile site. Many students find this easier to navigate and it also includes helpful links to the Library, Student Email, Canvas, and more.
Step 1: Open App Store/Play Store on your mobile device, open the App Store (iOS) or Play Store (Android).

Step 2: Search for ctcLink, in the search bar, enter "ctcLink"
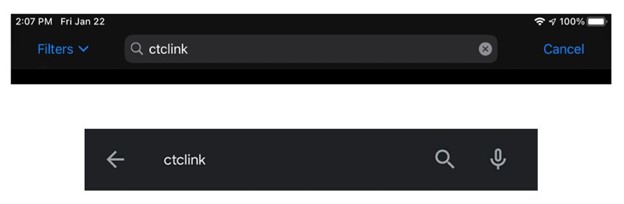
Step 3: Locate ctcLink App, locate the ctcLink app from the search results.
Note: The app publisher is WA SBCTC or WA State Board for Community and Technical Colleges.
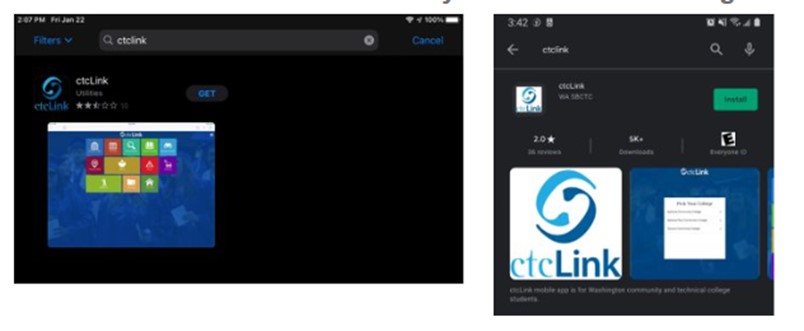
Step 4: Install App, once located, install the app on your device.

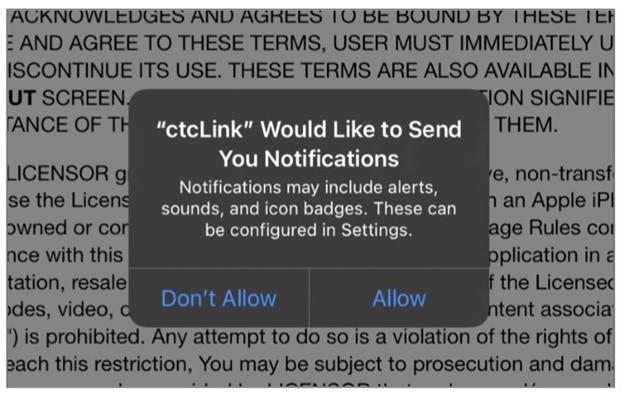
Step 5: App Notification, once installed, open the app and choose whether or not you want to allow notifications.
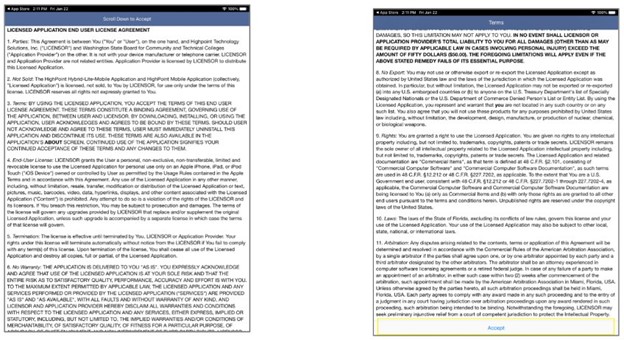
Step 6: Review Terms and Conditions, review the Term and Conditions. Scroll to the bottom and Agree/Accept.
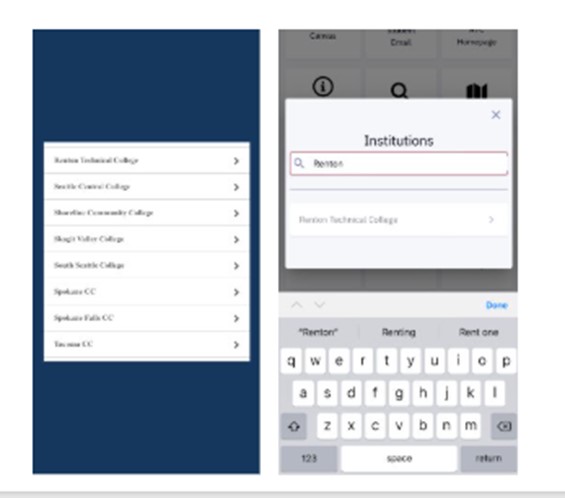
Step 7: Select Renton Technical College, the list of institutions will appear. Locate and select Renton Technical College (you may use the search bar to lookup Renton Technical College.
Step 8: ctcLink Homepage. Once Renton Technical College is selected, you will be brought to the Renton Technical College ctcLink page.
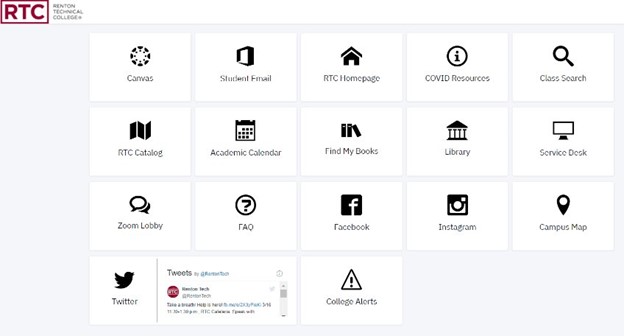
You can access:
- Student Portal
- Canvas
- Class registration
- Tuition payment, and more
A ctcLink support team is working with colleges and system partners to ensure accessibility with the new state-wide community and technical self-service portal and mobile app. To Enable Screen Reader Mode option on the ctcLink Sign In page, you will need to adjust your individual preferences manually to enable the screen reader mode. Once you make the change, it will remain active until you turn off the feature. Instructions can be found at Enabling Screen Reader Mode.
The mobile site includes a “tiles” homepage that provides convenient access to Canvas, academic catalog, and other college information. All the tools students need to enroll and manage classes are available in both the full site and mobile site. Many people find the mobile-friendly website more helpful and convenient.
Aside from activating your ctcLink account or making payments or uploading documents, yes. All the tools available in the main ctcLink website are available in the mobile-friendly website. However, the interface does look different on the mobile-friendly website, especially, when viewed on your smartphone. The specific way you perform a task, or the path you take to any given tool, will be slightly different than the main ctcLink site.
Yes, absolutely. The mobile-friendly website works perfectly fine on your desktop or laptop computer. In fact, you may prefer it over the main ctcLink site.
General FAQs
Frequently asked questions about ctcLink.
It’s a new system that students can use to register for classes, see their program plans, check their financial records/aid, as well as their academic records. Students can do all of this themselves online or using the ctcLink mobile app.
No, ctcLink does not replace Canvas. Learn more.
New students apply online. All admitted students register through ctcLink. Remember to write down your ctcLink ID.
Yes, using the Full Site version of ctcLink. If you are on the mobile site then it will redirect you to the Full Site when you want to pay.
Tuition and fees have not changed, it’s just that now you can see a detailed list of the charges. Please visit the Tuition and Fees page for more detailed information.
Please contact Enrollment Services to look up your record. The records converted from our old system to ctcLink were limited. However, we still have older records stored in our old system, which can be accessed by staff only.
You can see our published online schedule on the RTC website. You can also view it when you are logged into ctcLink under “Class Search”.
ctcLink is a shared system across all 34 Washington community and technical colleges (or CTCs). Your ctcLink ID and login is the same for each school. If you have a student or employee record from another ctcLink school, then you will see that information in your ctcLink.
Find tutorials and other helpful guides on our ctcLink Student Tutorials on this page.
Technical Support or Technical Assistance: servicedesk.rtc.edu or servicedesk@rtc.edu.